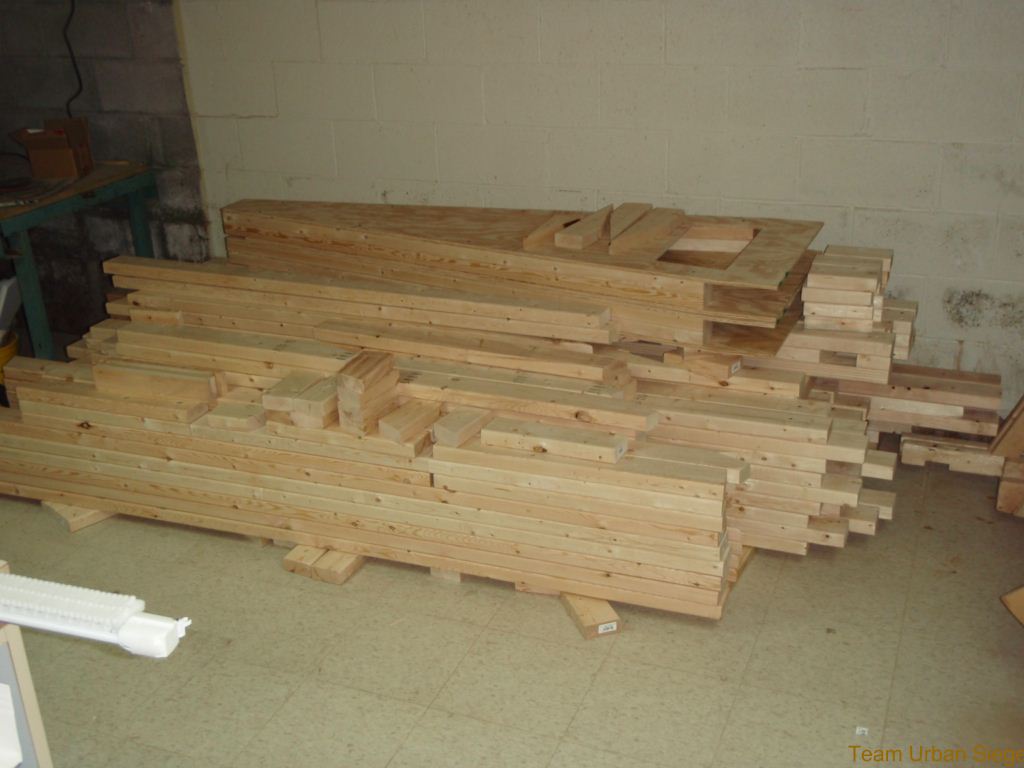
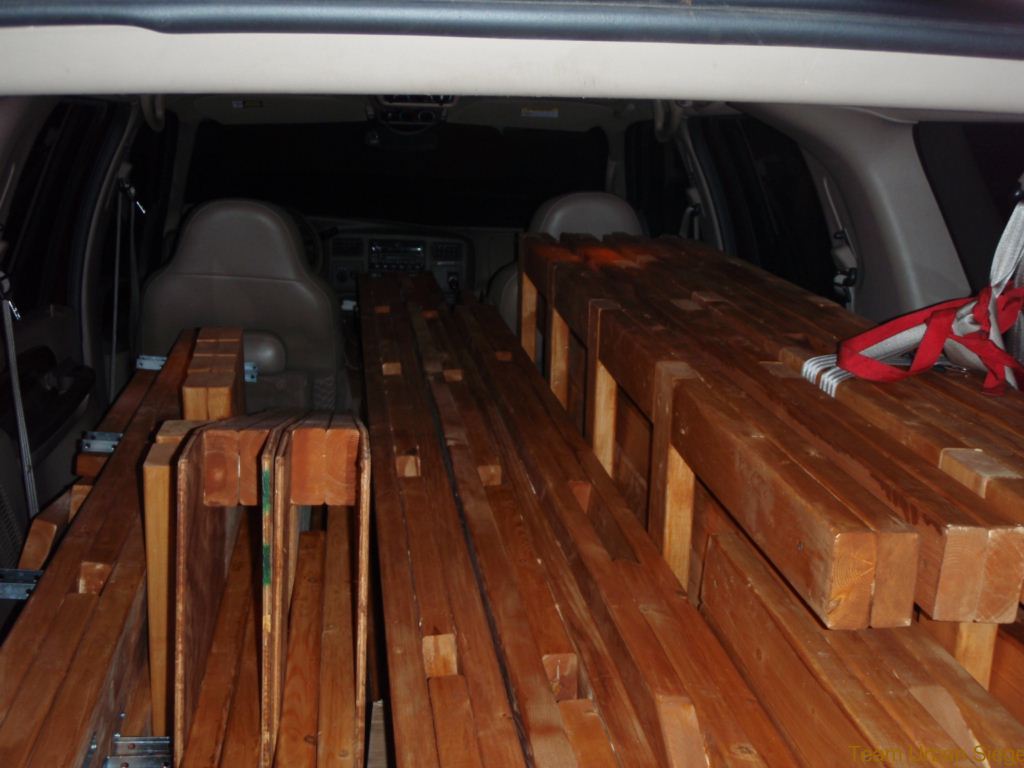
Most of the Summer and Fall of 2008 was spent building Medieval Postal Service. After the frame design was completed in late June, the first pieces, the bases naturally, were cut in early July. Throughout the course of the next month we would purchase wood (picking carefully through the pile at Home Depot, getting roughly 20 boards at a time), and cut more pieces. Come early August, most of the wood frame pieces were cut and the sub-assemblies built. However, the arm, hanger, tracks, carriages, and other assorted components were still being designed. And that process was stalled even further when in mid-August Matt left town for close to three weeks due to the impending death of a family member. Jason was also gone on vacation for close to two weeks during this time, and so not much got accomplished on Medieval Postal Service during the month of August.

Nevertheless, by the beginning of September the metal components had all been designed and a list of materials was sent out to be acquired. Many thanks to Great Lakes Pressed Steel in Buffalo, NY for getting all of the steel and aluminum for us, and for subsequently allowing us the use of their machine shop. More thanks go out to Glen at Great Lakes for all of his help with machining and in particular doing all of the welding for us. We later received many comments about those good welds at the World Championships of Punkin' Chunkin' in Delaware.
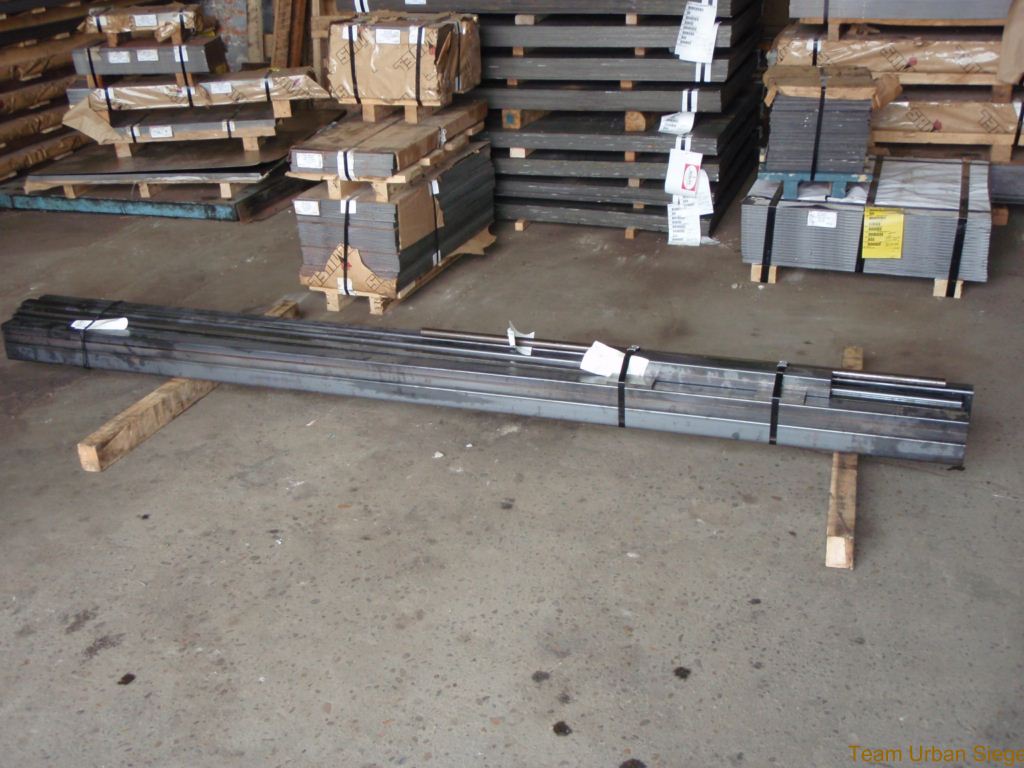
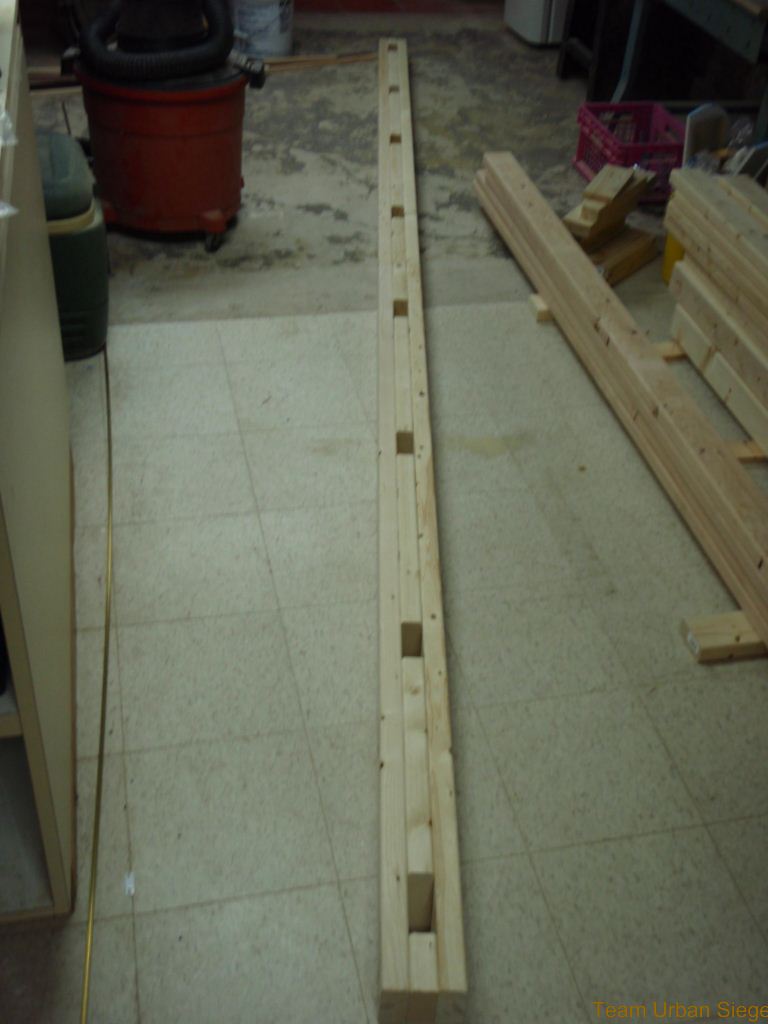
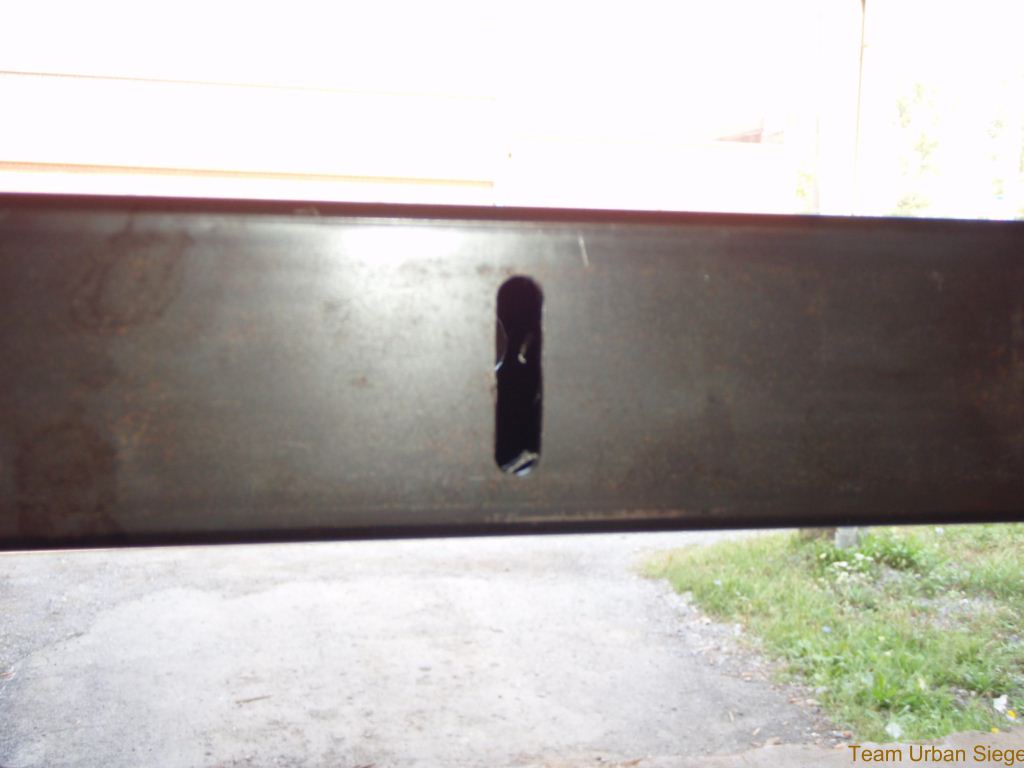
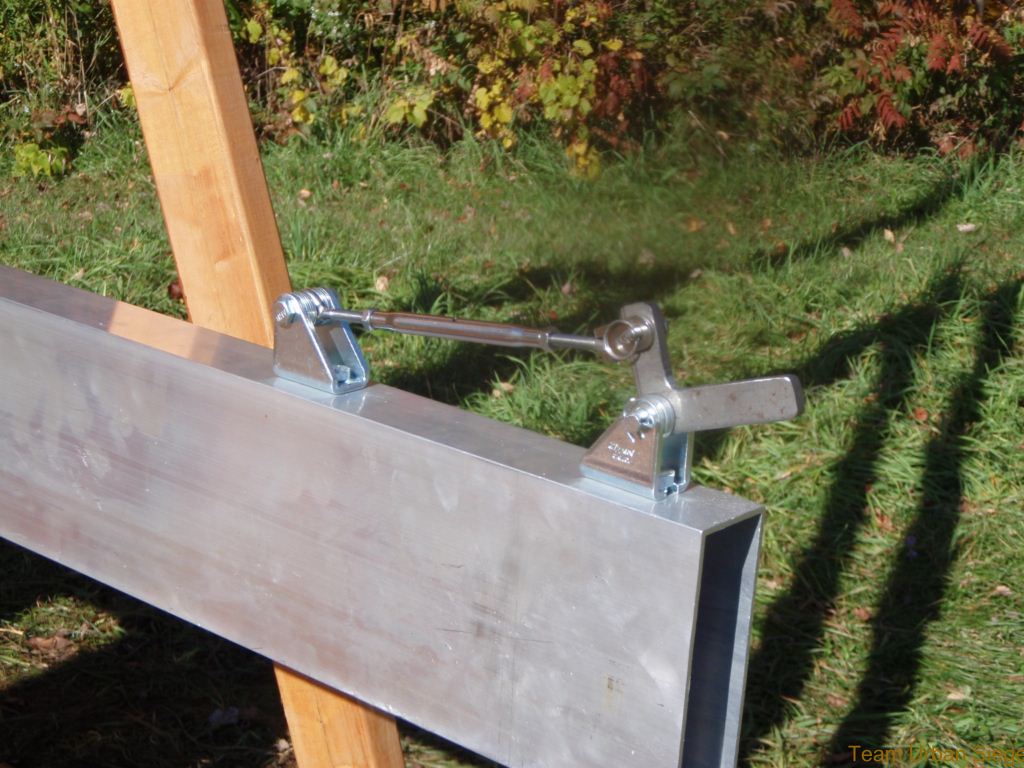
Anyway, early in September we dry-fit the lower portions of the frames together and drilled all of the holes to bolt the frame together. We then spent close to two weeks sanding and staining the entire machine, completing this around mid-September. The bulk of the metal had come in by this time, so we went out to Buffalo on September 20, 2008 to begin the machining work. That day we managed to get the rails cut and welded together by about 3:30 in the afternoon. These took so long due to having to cut a total of 16 slots and drill and equal number of holes in the two bottom rails for our adjustable attachments. The slots allow us to fine-tune the alignment of the tracks after assembling the frame, since wood can and will warp and expand/contract over time. Then we (well, Glen really) needed to weld 6 vertical strips of steel to join each bottom rail to the top rail, and this was a lot of welding (12 total strips, 48 welds 2.5 inches long each). Still, this was what we hoped to get done this day, and we left to return to Rochester that evening.
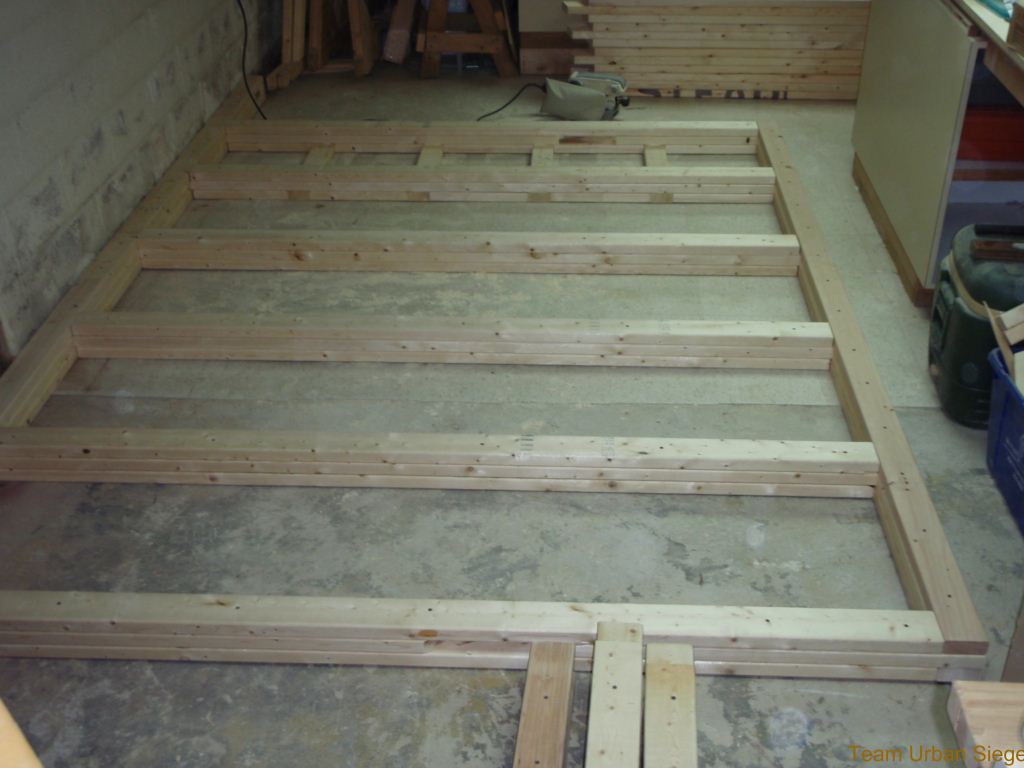
After getting back to Rochester that evening we loaded up most of the frame into the truck, along with the rails that we had brought back with us, and headed down to Nunda, NY the next morning. In Nunda was a camp that we had secured permission to set up and test fire at that fall. More thanks must now go out to Camp Cherith of Western New York for allowing us to use their field, though it will be too small for us next year, we are looking for a new one. We spent the day Sunday the 21st assembling the lower portion of the frames together. We first had to drill all of the holes in the cross braces and outrigger bases to assemble the base of the machine. This took us a while, but by lunch time we had the base completely together. We then began putting the verticals into the bases, and putting in the bolts that we had pre-drilled for earlier in the month back in Rochester. Unfortunately, not everything aligned correctly, and some of these holes had to be re-drilled. This took time.


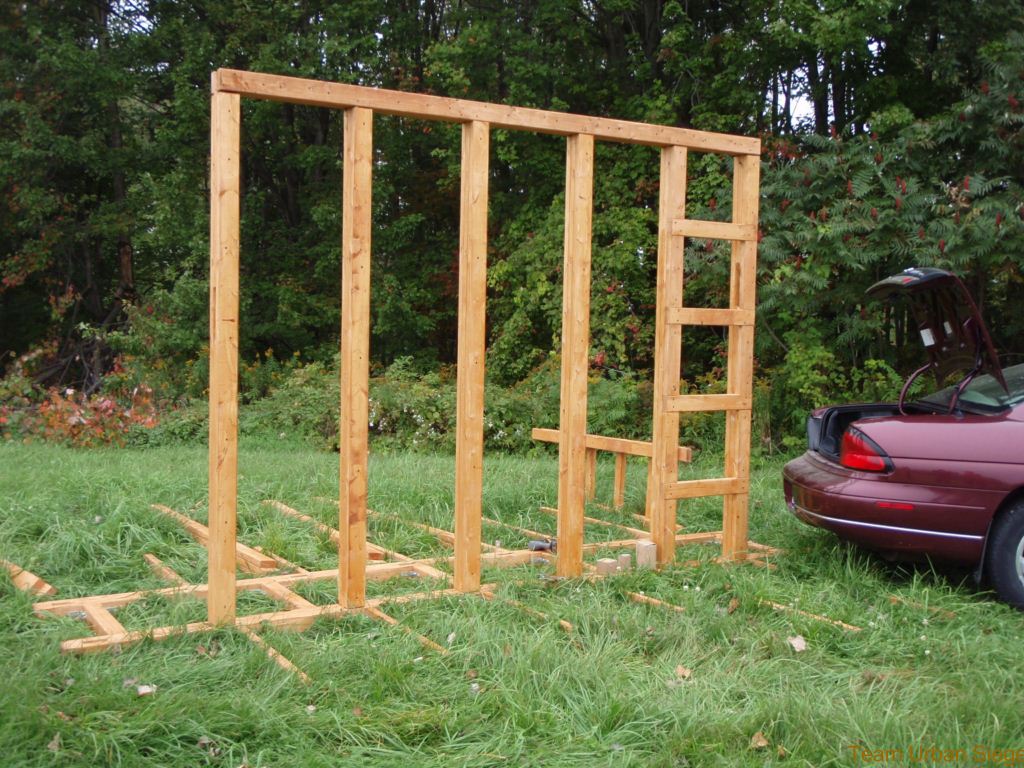
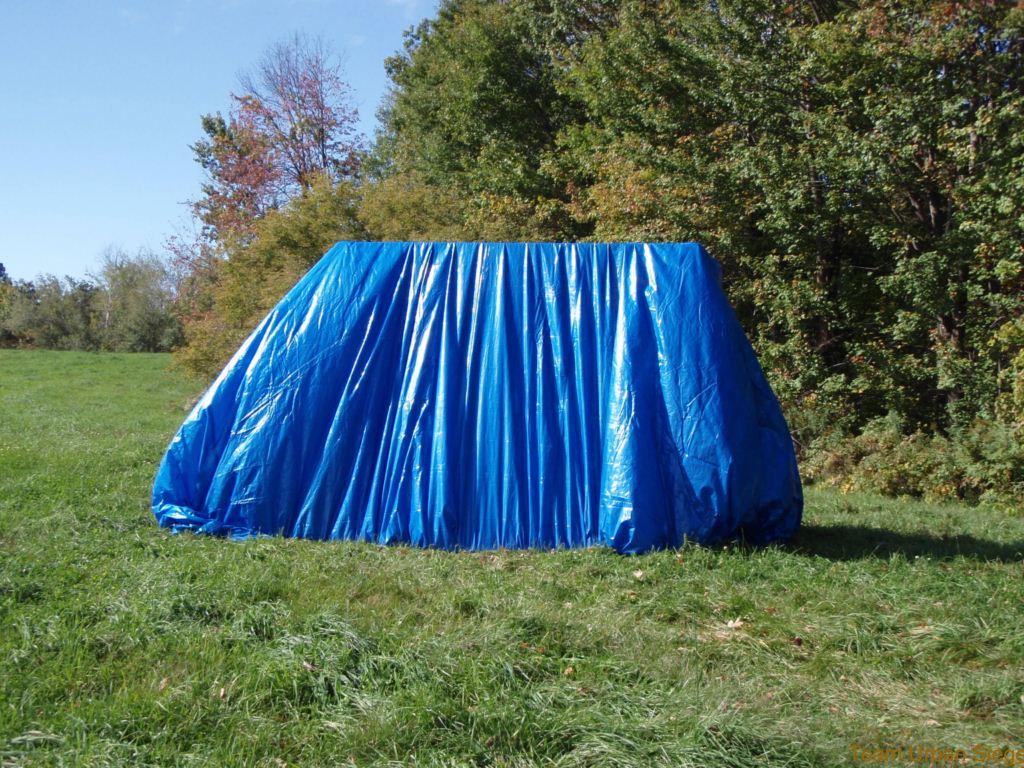
Still, by late afternoon we had the entire lower portion of the frame assembled, including the 8 lower outriggers, though we still needed a second bolt in each end of these outriggers. It was solid enough for us to leave it for the week, however, and we covered it up and left. Every week we worked on the frame we would re-cover it before leaving, in order to shed the bulk of the weather off of the machine. It was stained, but we wanted the extra protection, and it seemed to do well.
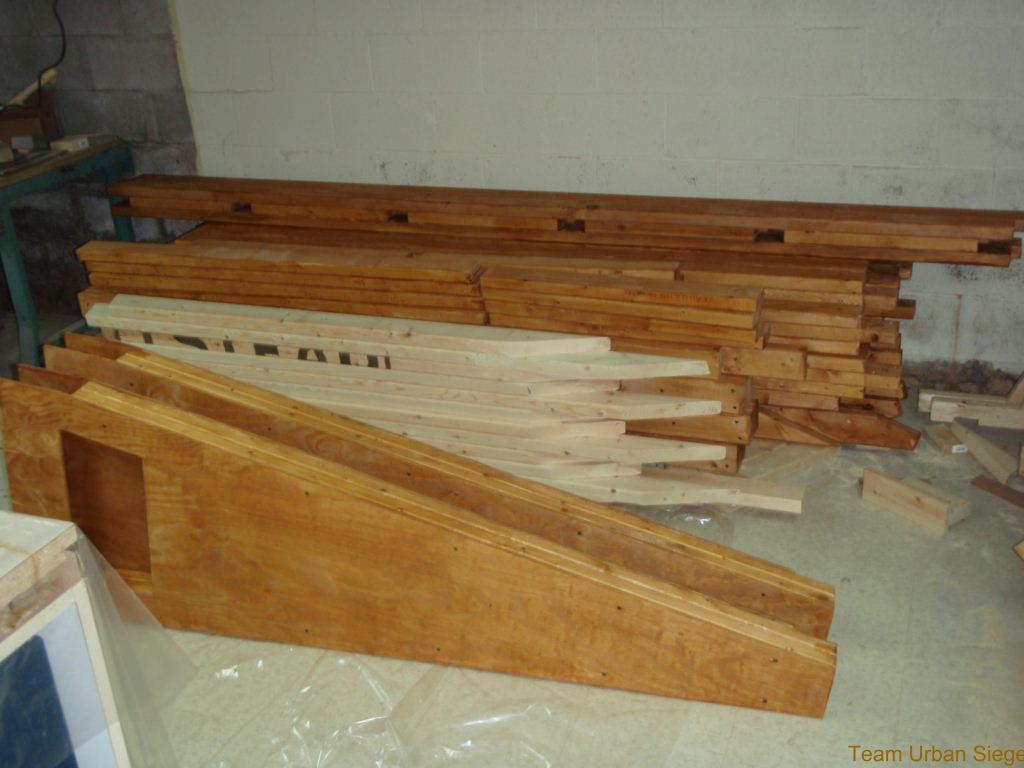
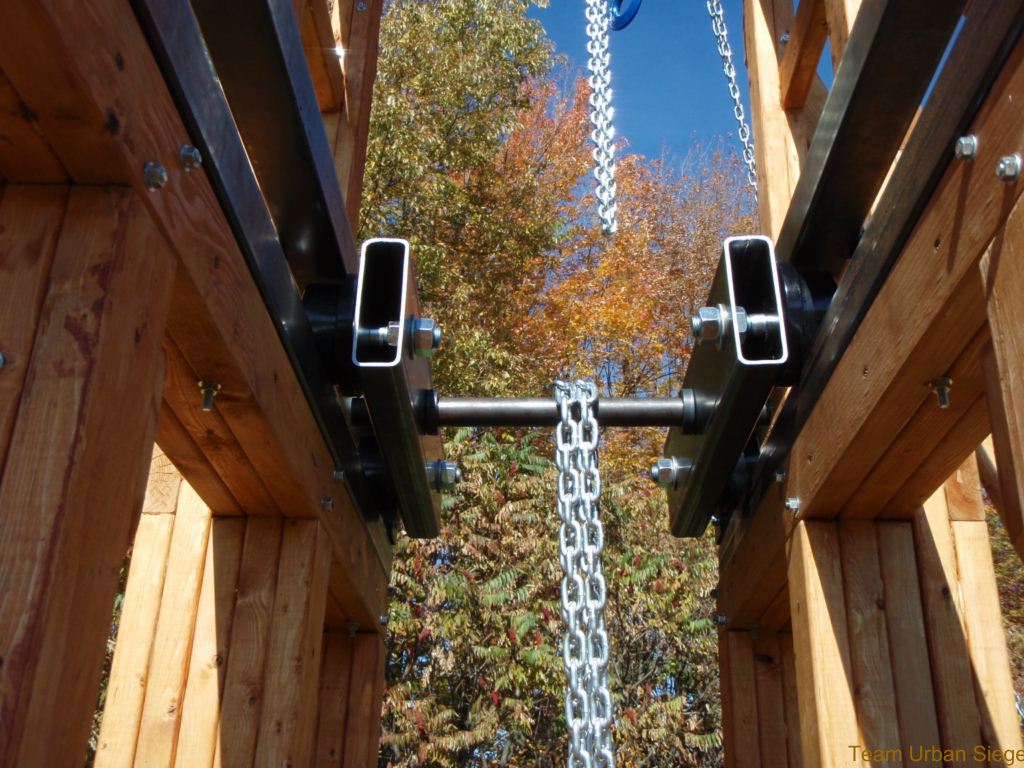
The following week Matt was again out of town for another family emergency, but Jason and Chris returned to Buffalo since the rest of the metals (mostly the aluminum for the arm) had come in. They spent the weekend finishing all of the cutting and drilling, and Glen did the remainder of the welding needed, which was on the hanger and the two brackets used for the anti-tip over bar. During the next week Matt finished up the wood components to Medieval Postal Service, which were the trough and the angled legs used to keep the frame from racking. These angled legs had to be reworked from how they had been originally made weeks before, as we had trouble getting them into their slots. Reworking these components into two-piece versions fixed this issue. Matt and Chris also test-fit the arm together, and found that it would not quite go together. The main axle hole needed to be slightly opened, but we figured that it could be filed down. Some other components needed slight tweaks, however, particularly the carriages, which Jason and Chris had forgotten to drill the wheel axle holes in.
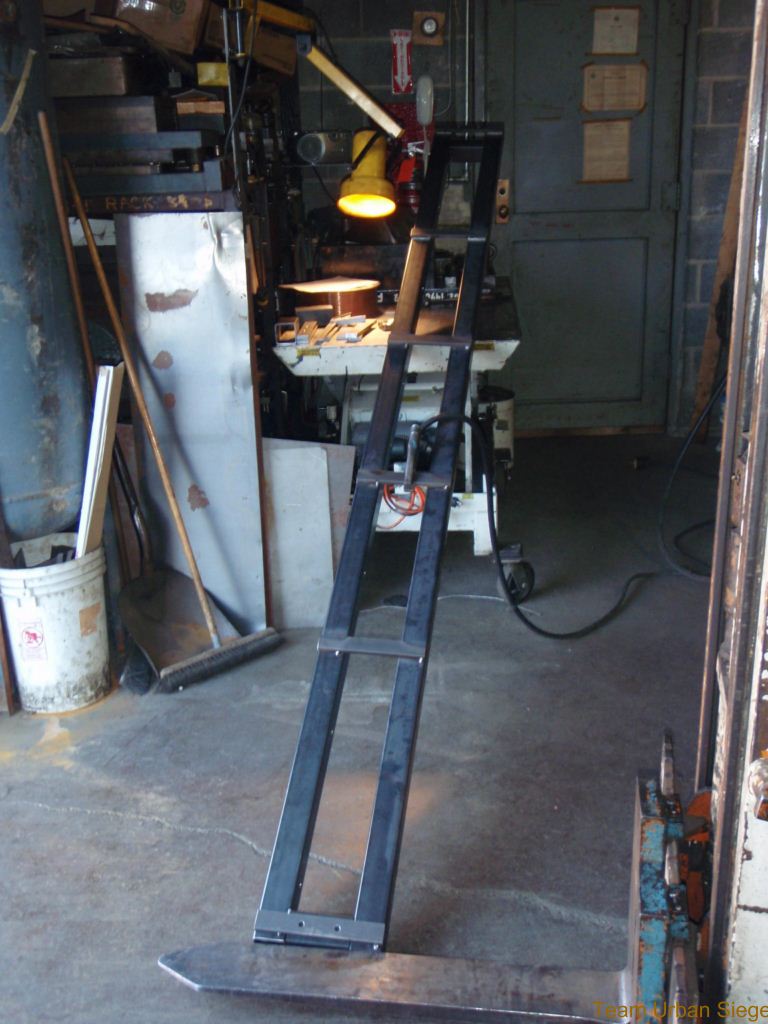
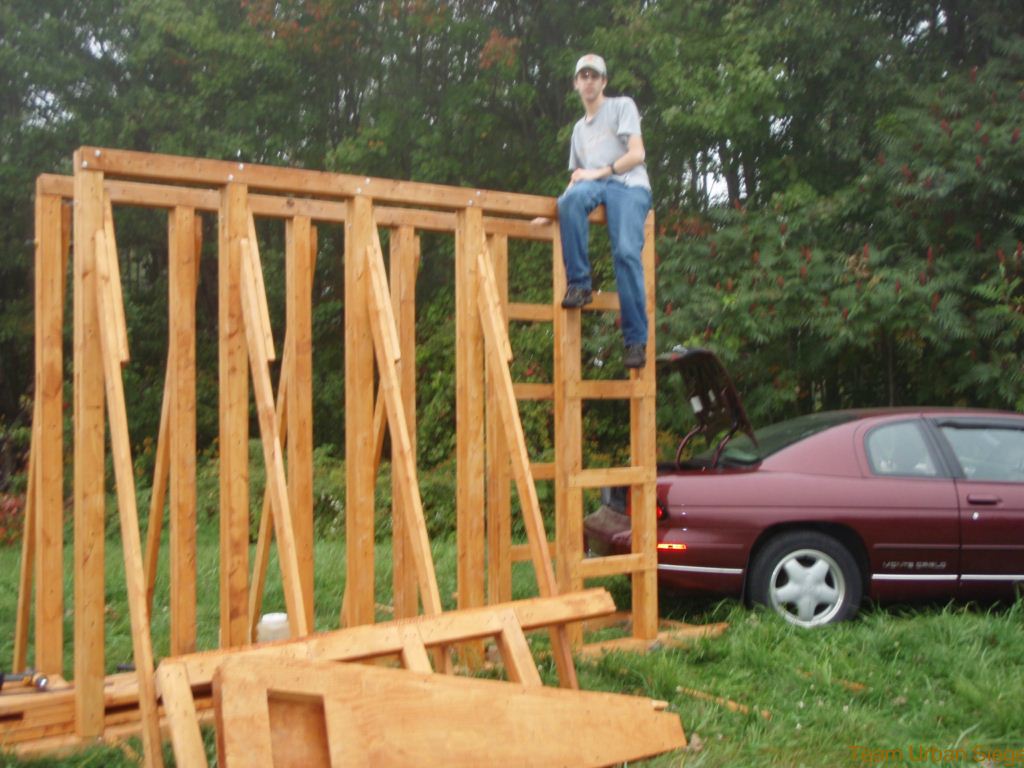
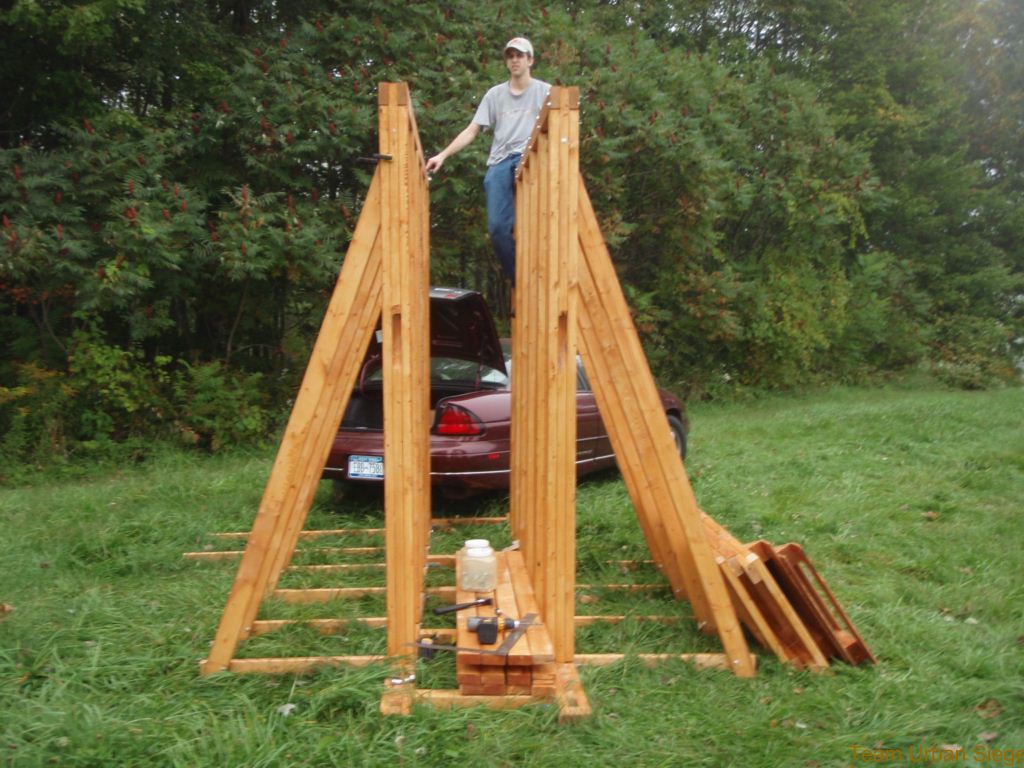
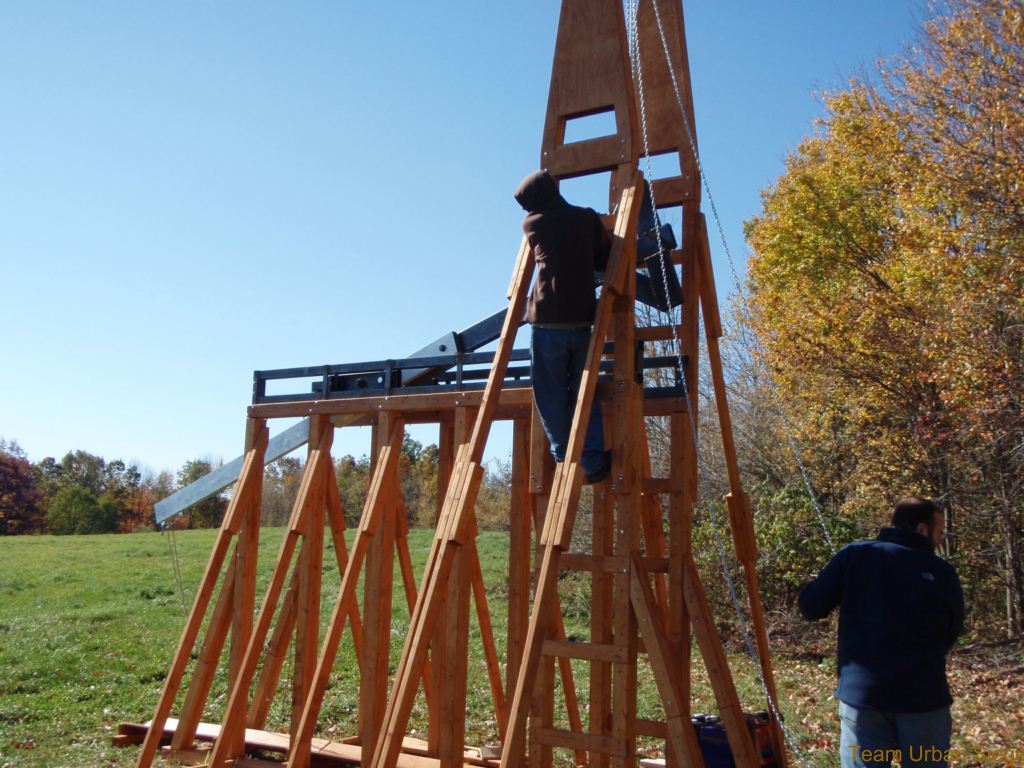
We returned to Nunda that weekend, the 4th and 5th of October, with the intent of getting shots off on Sunday. Jason went to Buffalo first, to get the holes drilled and parts tweaked that needed fixing. Matt and Chris spent the morning starting to get the upper ladders up, and Jason arrived just in time to help finishing this. Then we put the upper caps on these ladders, and the crossbeam to be used for cocking the machine. Now we were ready to mount the tracks. Using the 20 foot chain fall we had acquired for cocking the machine, we lifted each track into place and marked the center of each slot for drilling. Then removing the tracks, we drilled the holes and re-mounted the tracks.
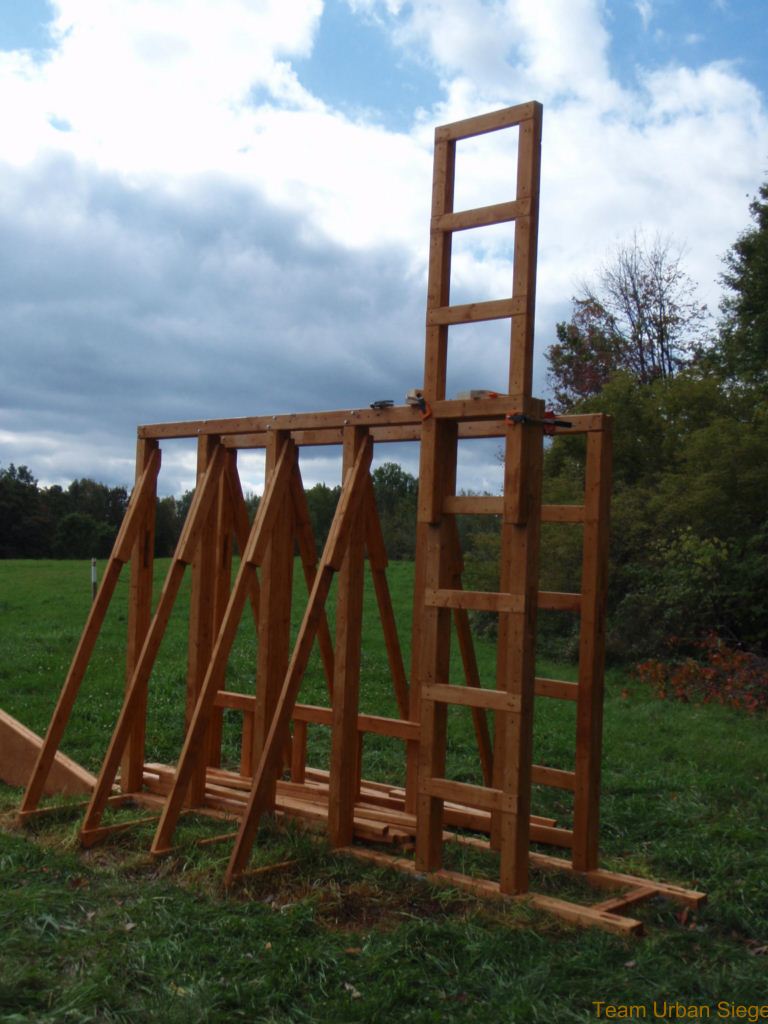


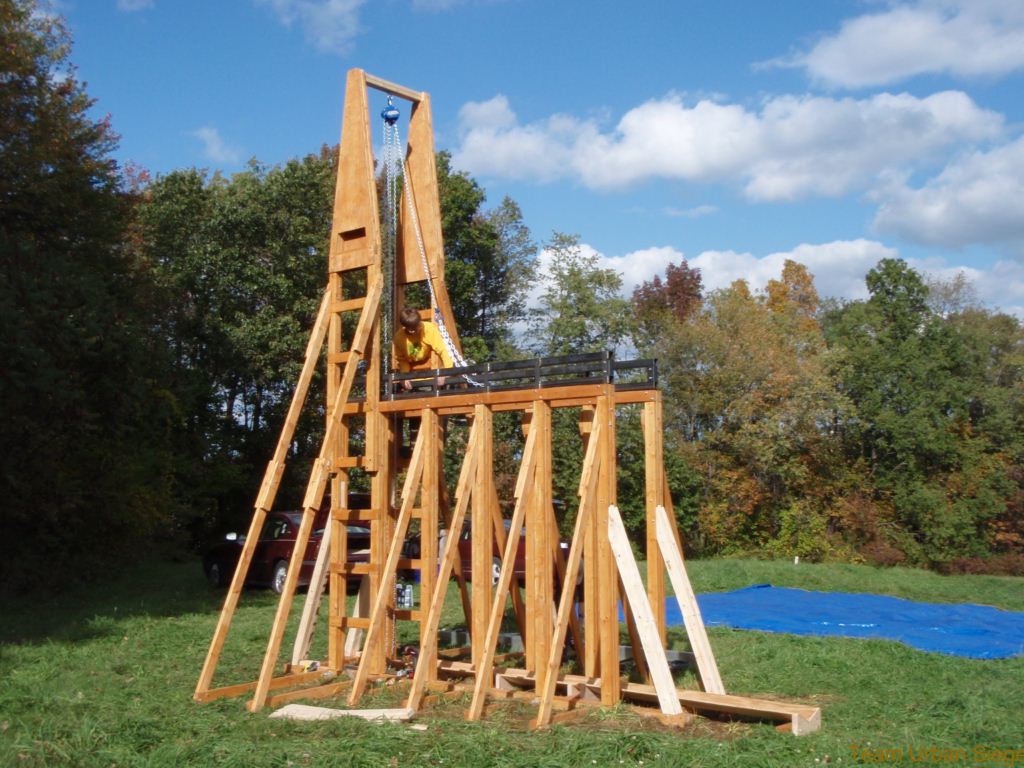
This was all we were able to accomplish this weekend, however. In trying to file the main axle holes down in the arm, we made little headway. We were barely able to force it all together. Chris took it back to Buffalo during the week and got the holes drilled out some, which solved the problem. We could now spin the main axle freely on its bearings. The following weekend found Matt busy all day Saturday with a prior commitment, but Chris and Jason went down and began work. They put the towers back up (we had to take them down each week to tarp things), inserted the freshly-stained angled legs and trough, and began mounting the various brackets on the arm and hanger (the anti-tip over bar brackets and release pin mainly). That evening Matt got down there, and we assembled the carriages.
The next morning we fixed the carriages (we put the wheels on backwards it turned out), and set to work. We finished mounting the brackets on the hanger and arm, and began to ready for shooting. We raised the carriages with the main axle between them and test-rolled them by hand (the arm was not mounted on yet), and all was good. So we took them down and attached the arm, then putting this assembly back up. Now to try to mount the hanger. We were unable to fit the hanger in between the short arms, however. We had neglected to design in some clearance in this joint, and that was what was hurting us here. Between struggling with this and lots of other nit-picking details that slowed us down all day, we had to call it a day, yet again without firing. We ordered some spacers that night to give us some clearance.

Fast-forward once again to the next weekend, October 18th and 19th. We hit things early Saturday morning, determined to get shots off that day. We spaced out the arm, and tried fitting everything together. We could now get the hanger into the gap, but could not get the axle into the holes through them. We had to spend over one hour filing down the holes in the hanger and short arms to get the axle to fit through them all. In the meantime we had to go drill new holes for the hanger bracket mount, as they had somehow been drilled in the wrong spot. Still, we had it all together in late afternoon and we pushed to get it cocked for the maiden shot.
Partway up we discovered that the chain we had looped around the hanger and hooked to the chain fall was too long, and we had to lower everything and start lifting again as the light faded. Right around 7PM on Saturday, October 18, 2008, we were ready for our first shot. We had no counterweight on the machine, as this was mostly intended to be a motion test to ensure all worked correctly, and we loaded a gourd into the pouch that weighed just over one pound. Under headlight power, we fired. Unfortunately, the gourd nicked the actuation system, and few out backwards, causing the arm and hanger to clang against each other violently. And with that, we called it a night, satisfied that we would at least have most of the next day to fire and get some counterweight on the machine.
The next morning we tried another no counterweight shot with a 1.5 pound gourd. Again, we hit the actuator bracket, but this time we were able to see what was going on. We decided to try again with 50 pounds of counterweight, thinking that this would help pull the arm and carriages downrange a bit, hopefully avoiding hitting the actuator again. This didn't work, as we hit the actuator again (incidentally, using the same gourd from the last failed shot, as it was still mostly undamaged). We noticed that the actuator was only half-way down its travel when the counterweight began to fall, and so we decided to try pulling the actuator quickly out of the way as soon as the arm began to rotate around. Again using the same projectile and 50 pounds of counterweight, we had a forwards shot that went roughly 350 feet on a very flat trajectory. We were in business. It wasn't the slickest of solutions, but we decided that it would work for this year, and we would do something different for next year.
On for more shots. One more shot with that battered gourd that was still intact, but with 100 pounds of counterweight this time. This time our jury-rigged rope pouch failed, sending the gourd flying high and backwards, exploding against a tree branch. Still, it hadn't hit the actuator. We had time for one more shot before needing to tear down the towers and tracks for the week. We jumped up to 200 pounds of counterweight and loaded up the 4-pound medicine ball that we use with Melon Felon. It was another very flat trajectory, but it was forward, and despite releasing on a trajectory below horizontal, the medicine ball traveled roughly 235 feet before bouncing several hundred feet further into some bushes. And with that, we had to cover up for the week.
The next weekend was intended to be used for launching some pumpkins on Saturday, and a few more in the morning Sunday before tearing down, but it was raining hard all day Saturday, so we did not even head down until around 10AM Sunday morning. We tore down in the howling wind and returned to Rochester. Somehow we fit the entire machine into the truck less the tools, which went into Matt's car. We were all set to head to Delaware except for a backstop, which we got all of the parts for Monday night. We headed down to Delaware Wednesday afternoon, ready to do our best. We had given up on breaking 1000 feet this year, but still wanted to put on a good show.