Medieval Postal Service

Medieval Postal Service is our first real competition-level trebuchet. Following Matt's trip to the 2007 World Championships of Punkin' Chunkin', we decided to work on building a trebuchet to take there to compete. The throw 8-10 pound pumpkins there, and the heaviest we had ever thrown was 6.5 pounds with Melon Felon, but we were not concerned about being able to build something strong enough to throw this heavier projectile. We could have easily scaled up Melon Felon and thrown a pumpkin around 4- or 500 feet, but that was the easy way out. We quickly decided that if we were going to travel the 450 miles each way to compete in front of thousands of people, we wanted to put on a good show. 1000 feet was set as our tentative goal, quite a distance especially when you consider that the furthest we ever threw was 375 feet with a baseball from both Jeckyl and Hyde and Melon Felon. Still, this distance would make us only the 4th trebuchet team to ever throw this distance in Delaware, and among roughly 10 teams world-wide to do this in competition. And it was achievable.
Not being clever enough to come up with our own super-efficient design (we certainly couldn't build some behemoth to blast one out there like Yankee Siege due to space and resource constraints), we looked at the most efficient trebuchet design known at the time: the Floating Axle King Arthur, or the FAKA. This design took the tremendous potential energy to frame height ratio of the King Arthur Trebuchet, which in the case of the original was somewhere around 50-60% efficient (an amazing amount for gravity power), and combined it with the benefit of a nearly vertical drop. We had discussed making a 4-footer one day, but now decided to go larger and go to Delaware with it.
There is debate among the hurling community as to whether dropping in an arc like the regular King Arthur does takes energy away from the projectile or not, but all evidence so far points to a straighter drop throwing much further. In the case of the FAKA, the main axle is put on wheels and allowed to roll forward when the weight begins to drop below horizontal. The design was little over one year old at the time, but earlier in the fall of 2007, the first full-size FAKA was built by team Janiki in Washington State. With an 8 foot long arm, and 700 pounds of counterweight, they threw all four of their competition shots in Burlington between 1000 and 1100 feet.
An 8 foot height was about the longest we could conceivably make as well, as we did not have access to a trailer, and the largest vehicle we did have access to was a Ford Excursion. This truck has a cargo bed length of 103 inches, just over 8 foot. Thus, we decided on an 8 foot frame height, with the tracks to sit on top of that. We initially decided to go with 500 pounds of counterweight, though that was upped to 600 pounds fairly quickly. We had less weight than J-Buchet, the Janiki FAKA, but we also intended to make our arm as light as possible, something we had struggled with in the past. J-Buchet appeared to have an extremely heavy arm, as it looked like steel, and we were pretty sure we could design one that could be made out of aluminum that was far lighter and yet still strong enough. In fact, we were able to design a forked arm, very much like the one we designed for Jeckyl and Hyde, that weighed in around 35 pounds for the three pieces of aluminum, and should be able to take the forces it would experience.
The really unique thing about Medieval Postal Service lies in its triggering. A normal King Arthur uses two triggers, and the FAKA is no different. But with having the axle on carriages, the carriages want to roll forward when the weight is cocked, due to the weight sitting forward of the carriages. In order to keep the carriages from rolling forward too early, an upper arm stop is necessary to push the carriages up against the rear stops until the secondary trigger triggers, usually around the time the weight has fallen to horizontal. This arm stop adds another layer of complexity to the King Arthur design, not to mention the addition of carriages. We had already had several issues with the secondary triggering on Jeckyl and Hyde, and we certainly could not afford misfires like the ones we had with Jeckyl and Hyde on something this big. We needed a simpler way of triggering this beast.
Our answer came from Tom Walker on TheHurl. While we made sure that no one on TheHurl knew exactly what we were planning (Matt instead said that we were looking at probably making a King Arthur, or perhaps a floater of some sort), Walker shared his new idea for a trigger-less King Arthur with Matt, thinking that it would solve our issue. His idea is copied below (thanks again Walker):

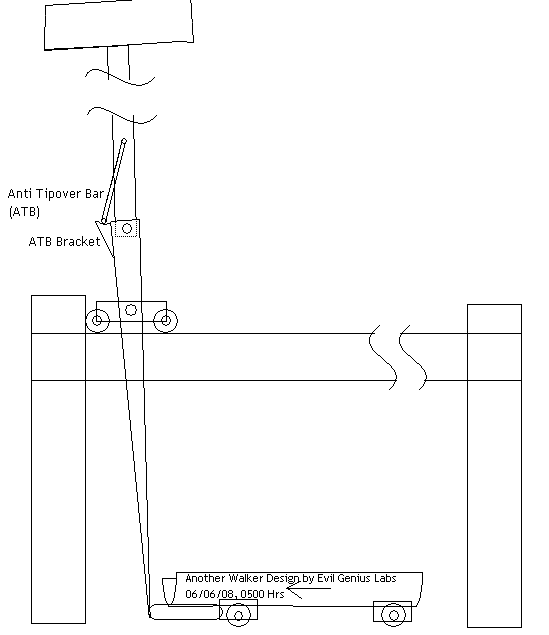
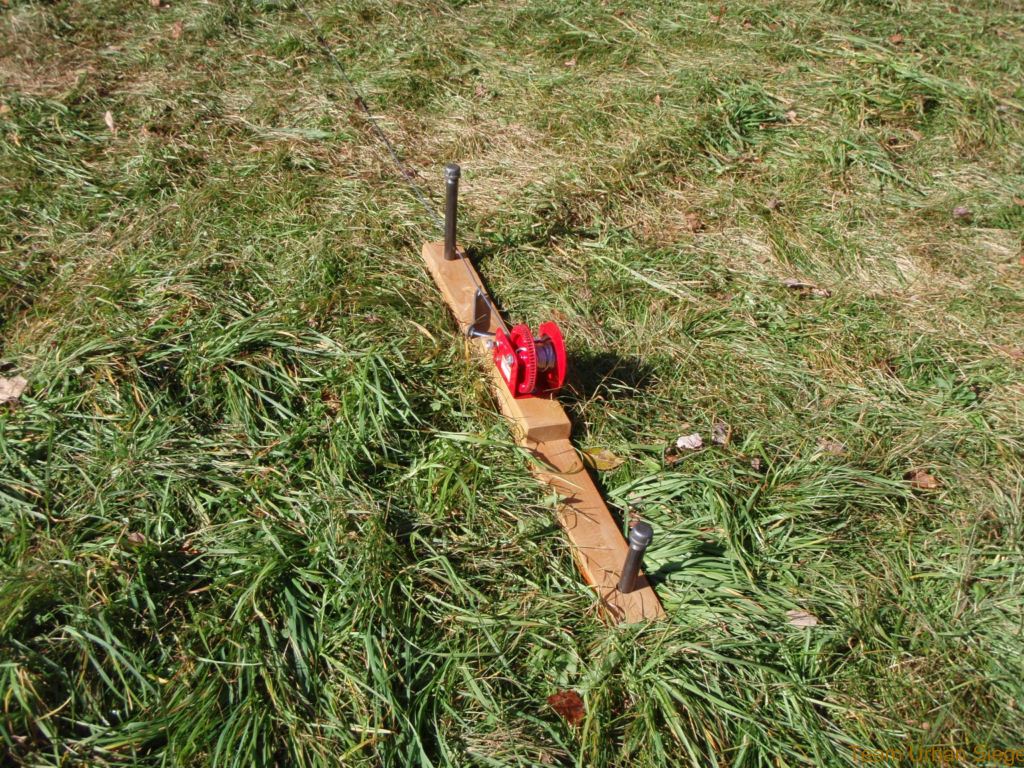
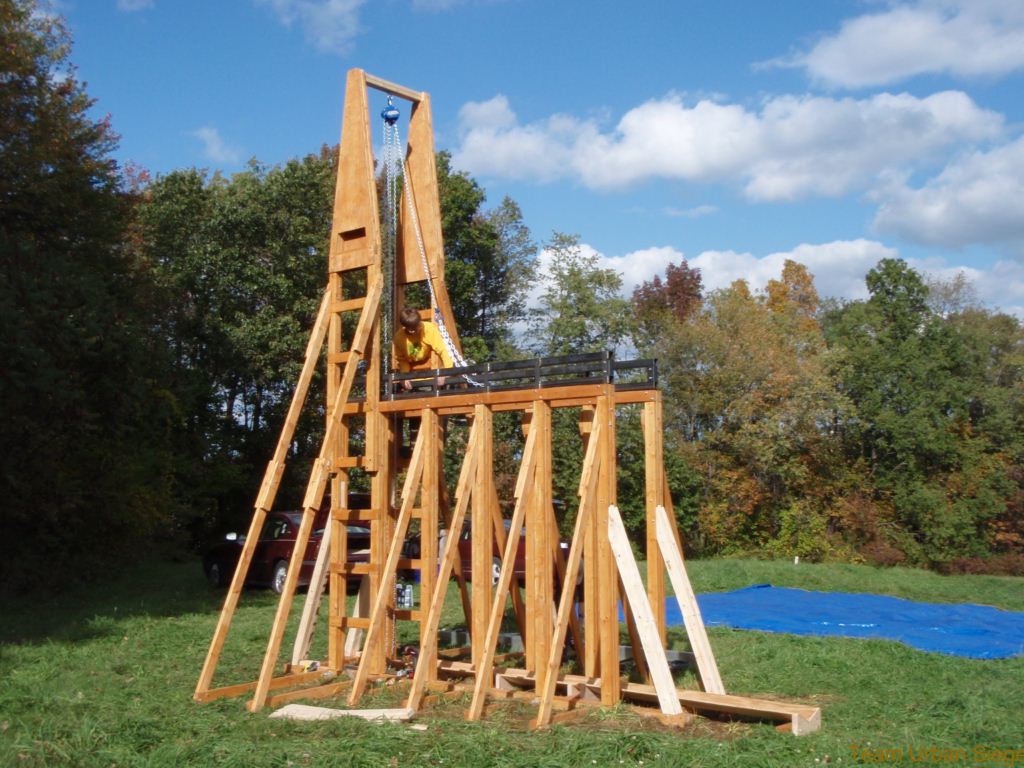
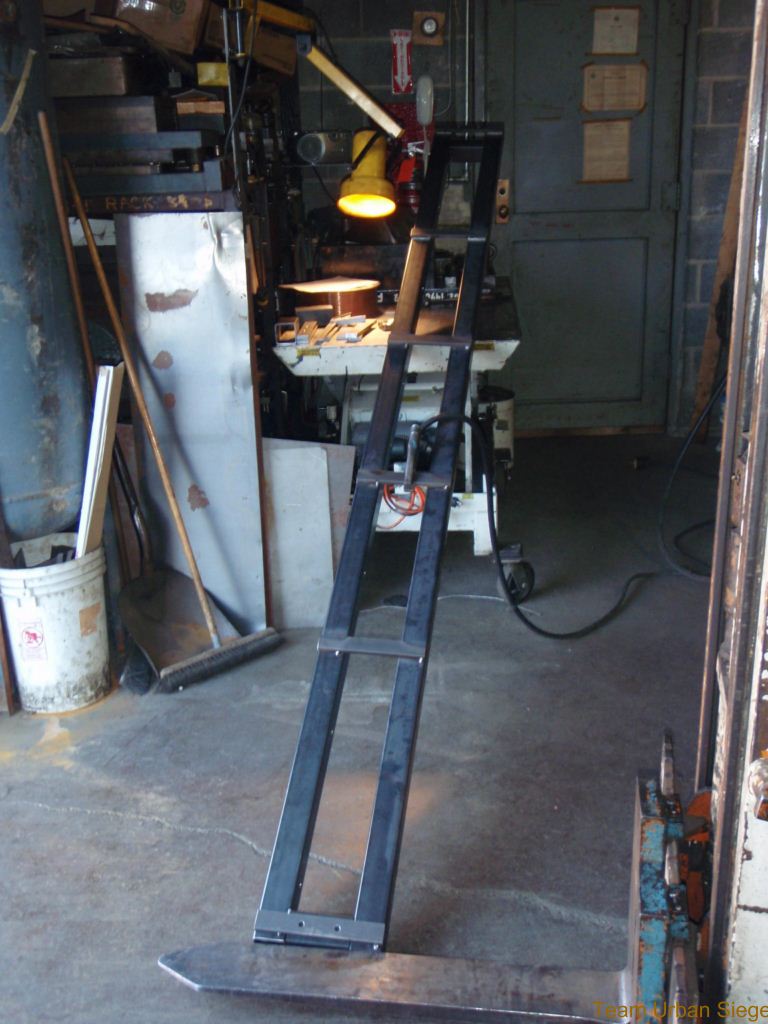
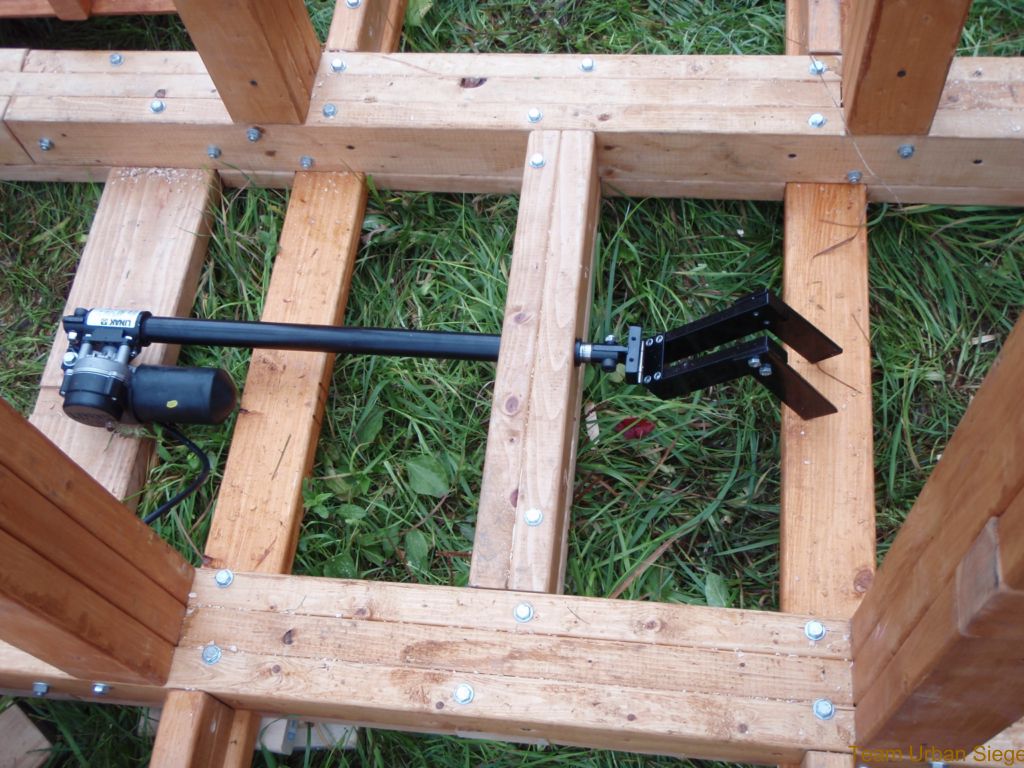
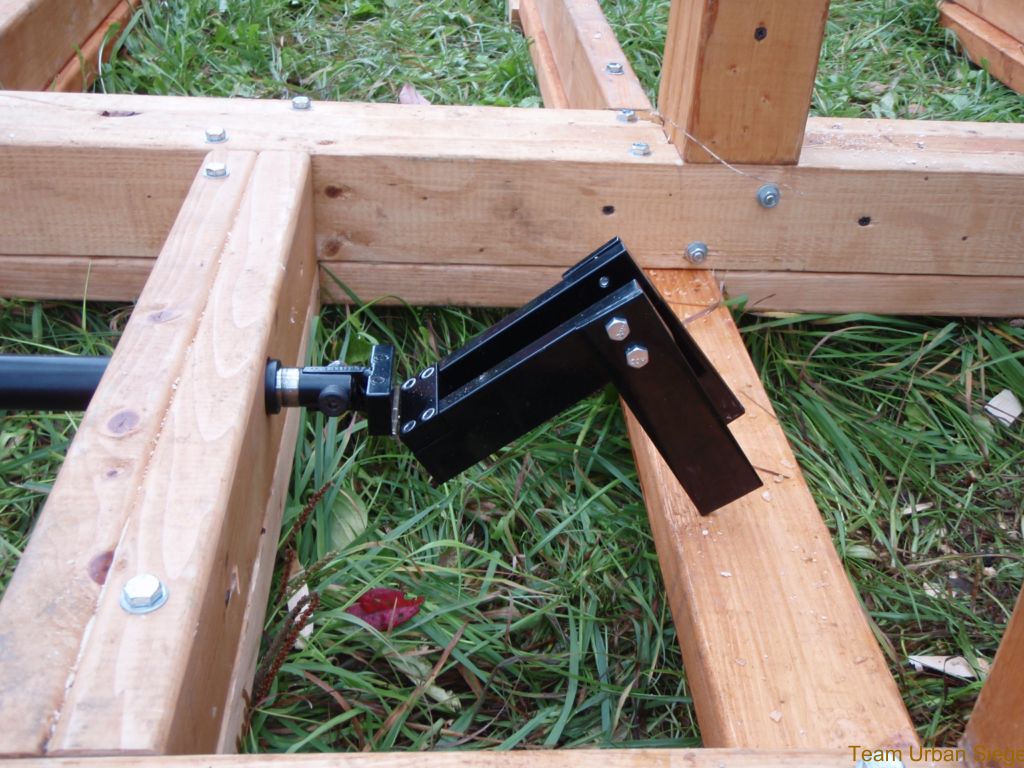
To fire the machine, the tip of the arm is pushed backwards until the counterweight begins to fall forward. It then pulls the arm around roughly when the hanger is parallel to the ground, and the bar (referred to as the anti-tip over bar - ATB, ARB in the first picture but the name was changed later) swings out of the way on is own. Designing the ATB and its two brackets was simple enough, but the trick was in the tip actuation. We needed to be able to push the tip somehow, and yet have it release the arm cleanly. We settled on a cup-shaped idea, where the back part is open, so the arm can swing out any time, but could not push downrange. We mounted this onto a pneumatic actuator Matt found on EBay for a steal, and moved the actuator with a 1 ton boat winch. The winch with its ratchet would ensure that the cradle did not slide backwards, which the arm would try to cause when the weight first begins to fall. We did not use the pneumatics at all, as it was added complexity (there is no electricity on the field in Delaware, and we were not about to bring a generator along -where would we put it?), and the compressibility of air could mean that the cradle might move backwards anyways, like we were trying to avoid. Putting a pulley at the end of the actuator allowed us to be able to trigger from 15 feet to the side of Medieval Postal Service. Of course, one thing that we thought we would avoid was the cradle getting in the way of the pumpkin, but as initially designed it interfered on our initial test shots, and our final shot in 2008 at Delaware.
There are many advantages to this mechanism. First of all, the simplicity of operation, as there is no secondary trigger to fail. Also, there is no need for an upper arm stop, as the counterweight leaning backwards will hold the carriages tight to the rear stops all on its own. Once the weight begins to fall, it pushes the carriages against the stops even harder, since it wants to fall straight down. Plus, there was no need to figure out how to do a primary trigger under the loads we were looking at. Not having the metal-working skills necessary for a trigger like on the original King Arthur, the only option we saw was the pin-through-the-arm-and-hanger trigger. We didn't think that this would be too easy to trigger with 600 pounds of counterweight load on it. No need here, just push the arm tip backwards. The only downfall to this design from Walker was that the ability to fine-tune the timing of the main arm moving was removed. However, Walker felt that the secondary was not really necessary to the FAKA design, and John Norcross (also from TheHurl) later debuted his smaller FAKA at the New Jersey Hurl two weeks before the 2008 World Championships. Of course, we had already gotten our machine built by then, but his success was encouraging to us. He had a secondary, but released it almost immediately after triggering the primary, so he basically had the same tuning we did. With a 5 foot main arm and only a couple hundred pounds of counterweight, he threw a 2 pound gourd over 800 feet, easily winning that division (second place was in the low-to-mid 400's). While the jury is still out as to whether the secondary trigger can improve distance on a FAKA, we hope to prove it doesn't matter.
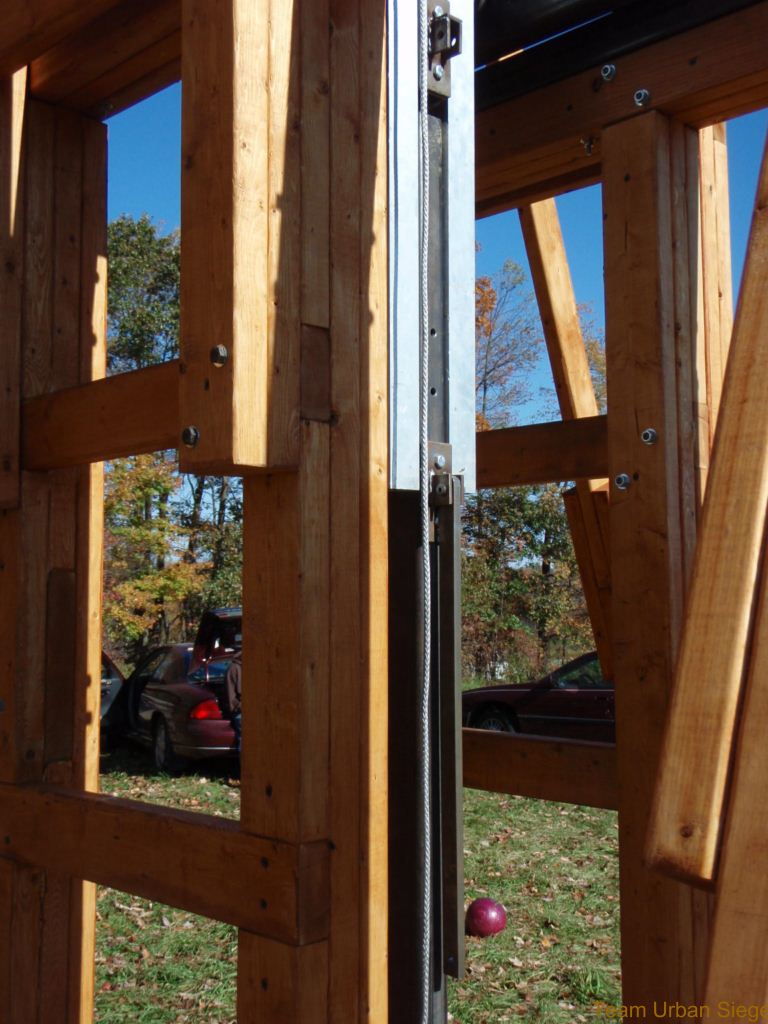
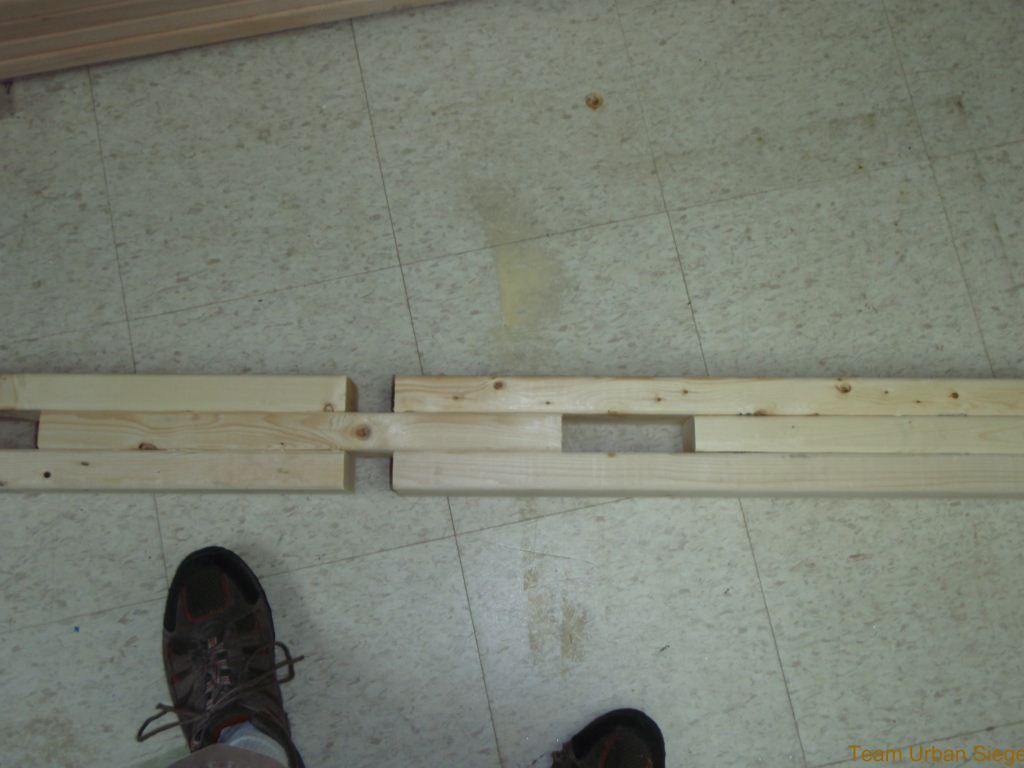
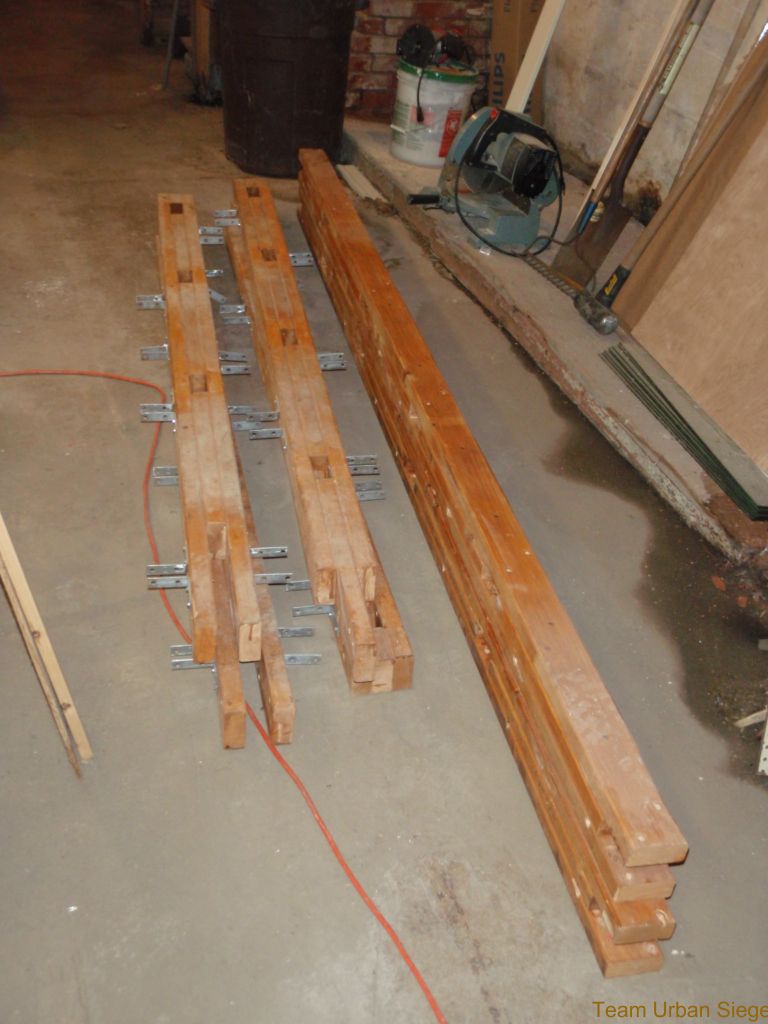
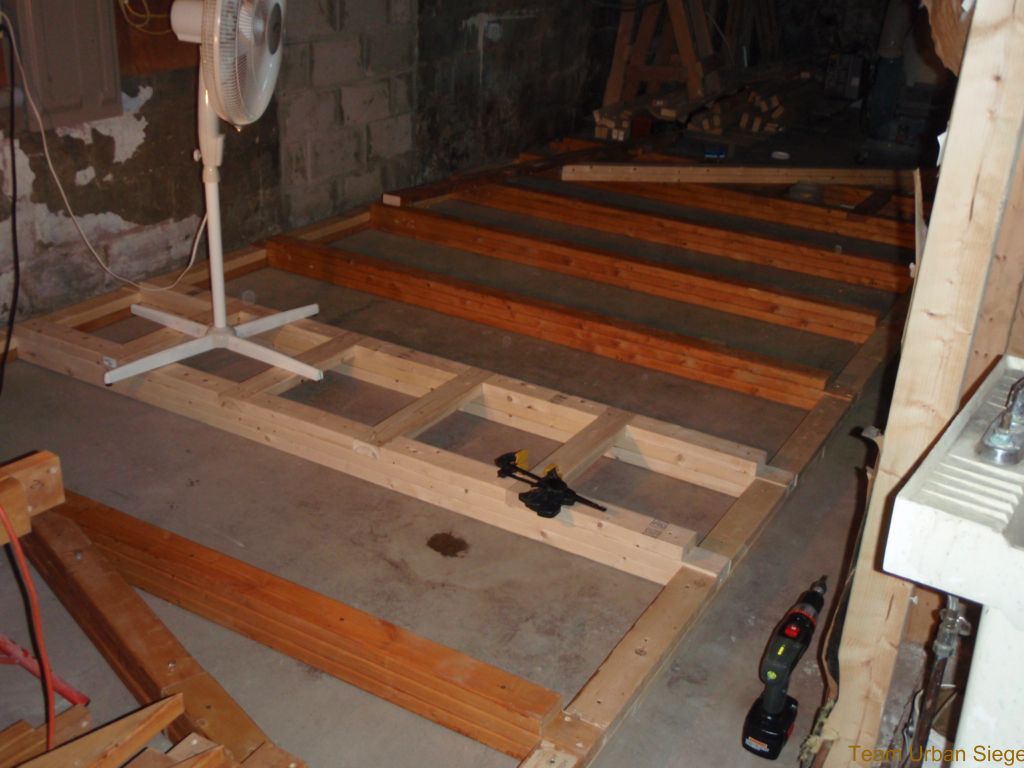
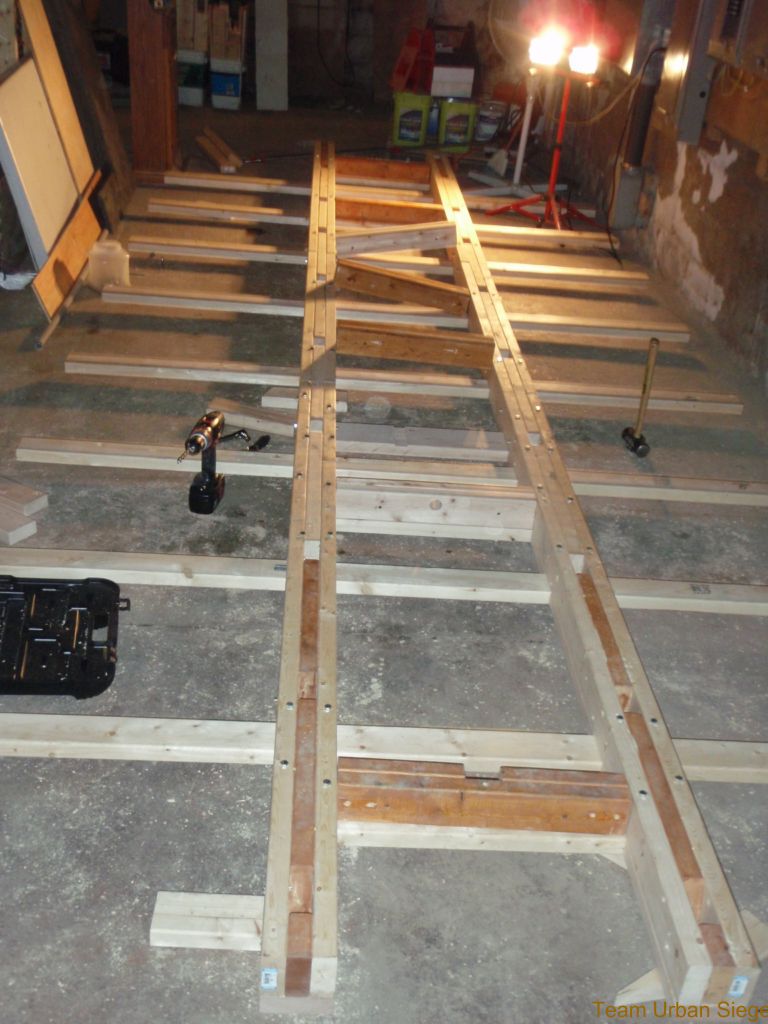
Our frame was designed mainly of laminated 2x4's, most often 3 thick, making natural mortise-and-tennon joints by staggering the layers. Again, we did not have the resources or experience with metal to make a solid steel frame, and we didn't think it would be necessary if done right. All of the joints were fastened with nuts and bolts instead of screws and glue, as we had to transport this beast in the back of the Excursion. The individual pieces of the laminated beams were screwed and glued together, however. The base of the frames was actually made up of 2 pieces, as it came in at 14 feet long, which would be difficult to transport. Drilled-out angle brackets fastened to the base beams gave us a way to bolt the cross braces together.
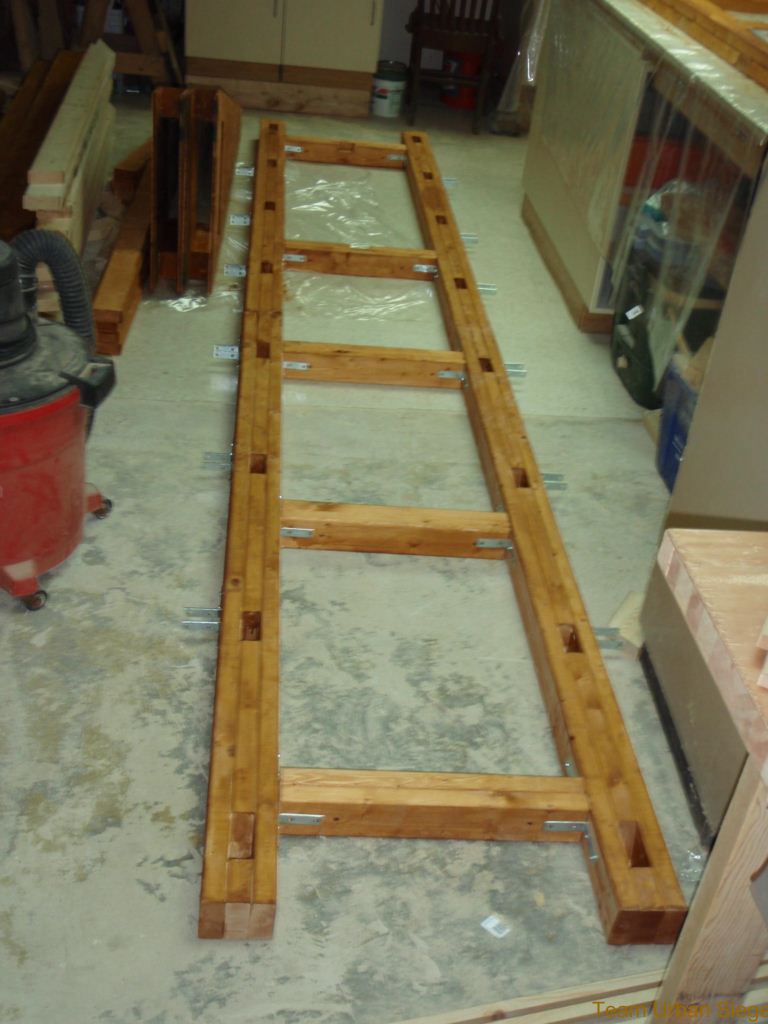
We also needed a way to cock this thing in a King Arthur type configuration. Melon Felon was one we could cock by hand, and Jeckyl and Hyde we could just manage with the 50-pound counterweight we used. There was no way we could do it by hand on this scale. We could do the typical method of cocking a King Arthur, which entailed a long beam and a winch, but opted for a more straight-forward solution. The first thing we did was design in a set of ladders at the back of the frame to allow us to climb up to untangle sling lines and such. Then we designed a set of bolt-on ladders that rose above the tracks (they bolted on outside of the frame so as to not interfere with anything else). On top of these extended ladders we placed triangular caps, which had a notch in them to accept a crossbeam. This beam would be roughly 18.5 feet above the ground, and have a hook to hold a 20-foot chain fall we got off of E-Bay. By hooking the chain fall to the counterweight, we could lift the counterweight up to position, and put no excess stress on the main arm. After cocking the machine, we would remove the chain fall and crossbeam. This meant that it took roughly 20 minutes to reset for each shot, but it worked well in general.
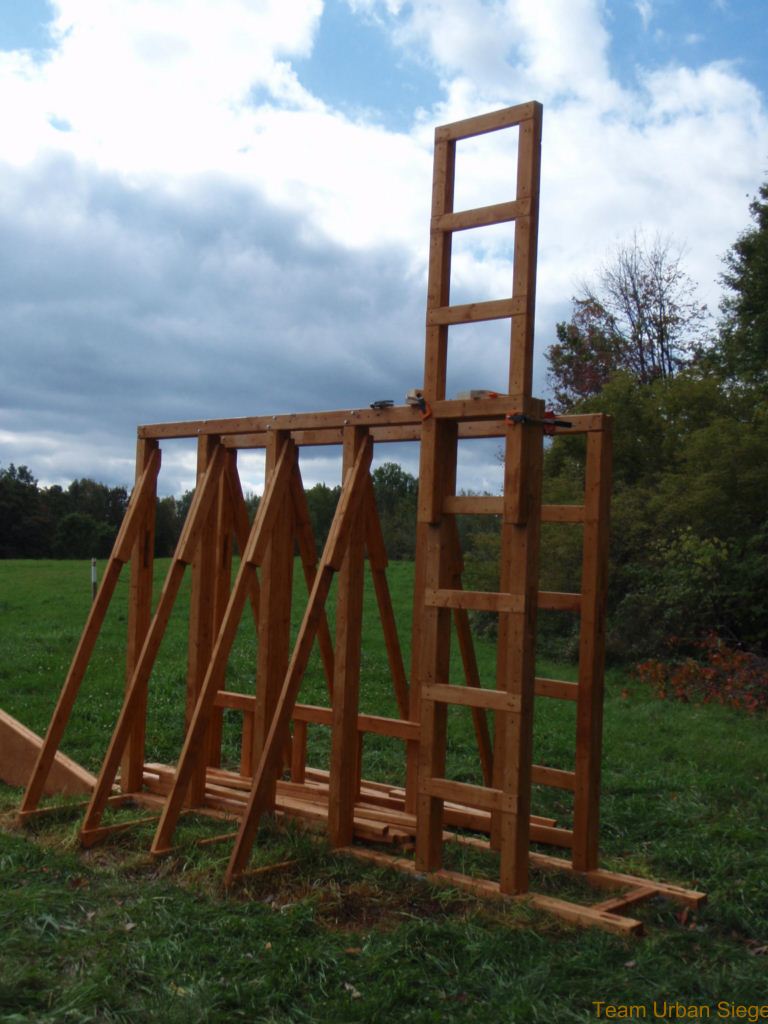

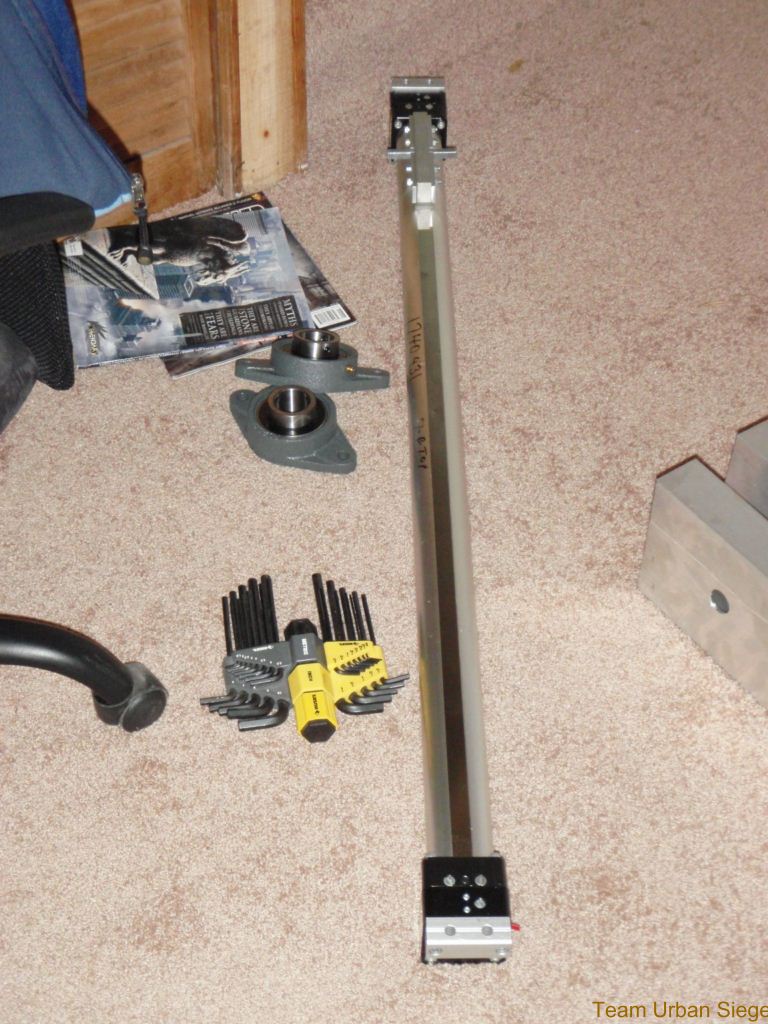
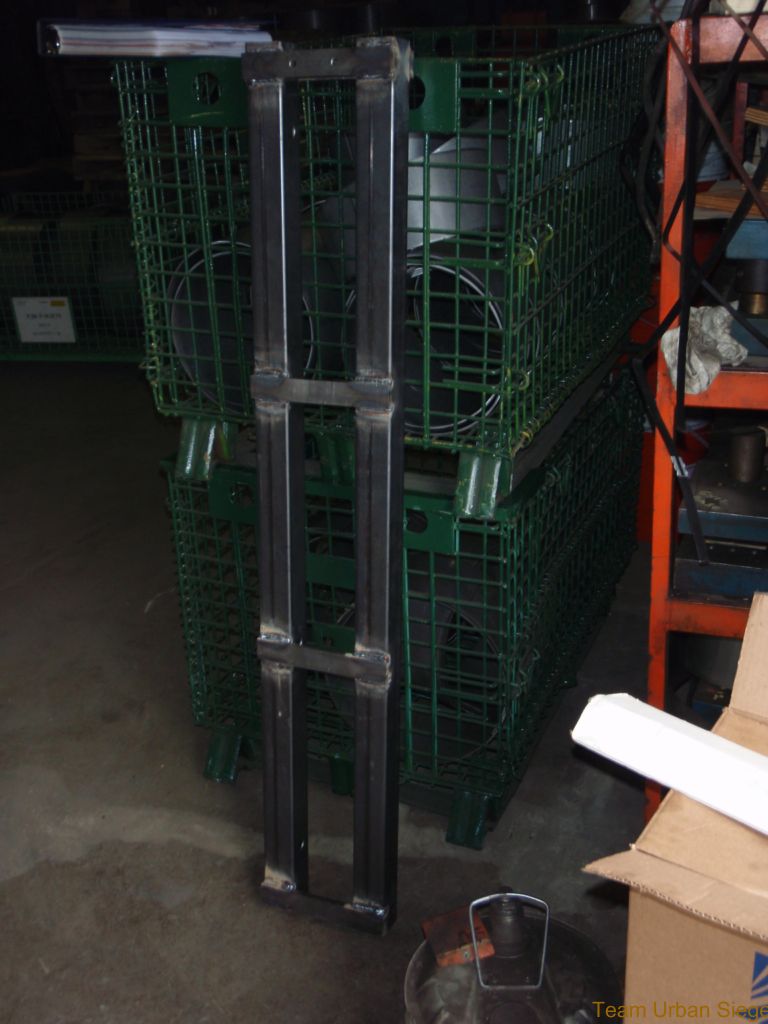
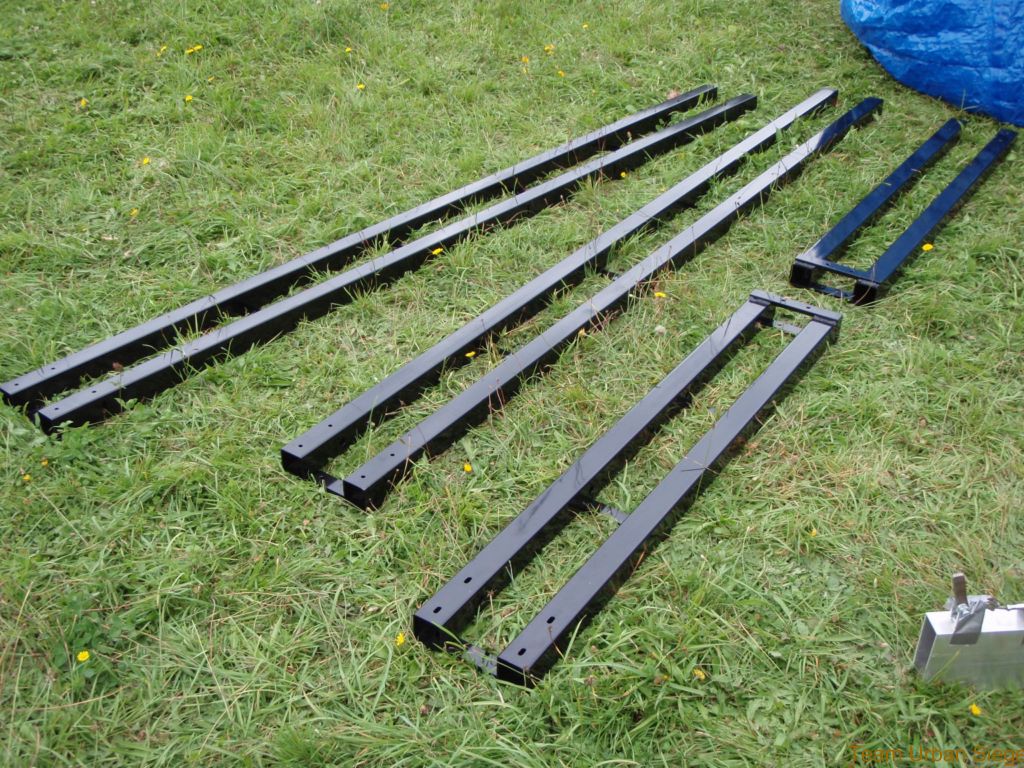
We still needed tracks, an arm, and a hanger, none of which were we going to make out of wood. The arm, as previously mentioned, was designed out of rectangular aluminum box, and the hanger was made from rectangular steel box of the same outside cross-section. The tracks we designed from square steel box, with vertical steel strips welded between the top and bottom rails. The top rail is used to keep the carriages from jumping off the track in the even of a misfire, and so is slightly above where the top of the carriage wheels are, so it does not actually touch the wheels unless they jump. By machining slots into the bottom of the lower tracks and putting a hole in the top of the lower tracks, we could drop in carriage bolts and secure the tracks to the wood frame. The slot width was just a little bit wider than the square neck of the carriage bolt so that the bolts would not spin (no way to get a wrench in there otherwise). The slots were designed in so as to allow us the ability to fine-tune alignment of the tracks relative to each other, as wood can warp and bow a bit with differing atmospheric conditions. Using the same box steel as from the hangers, we made a pair of carriage links that had three holes in them: one at each end for the wheel axles, and one in the center for the main axle. Bearings were mounted to either side of the arm instead of on the carriages, so as to simplify the design (and it allowed us to make the arm a bit lighter as well, as we got reduced stresses this way). For wheels we bought 4 flanged wheels with a rated load capacity of over 2000 pounds each, complete with internal roller bearings.
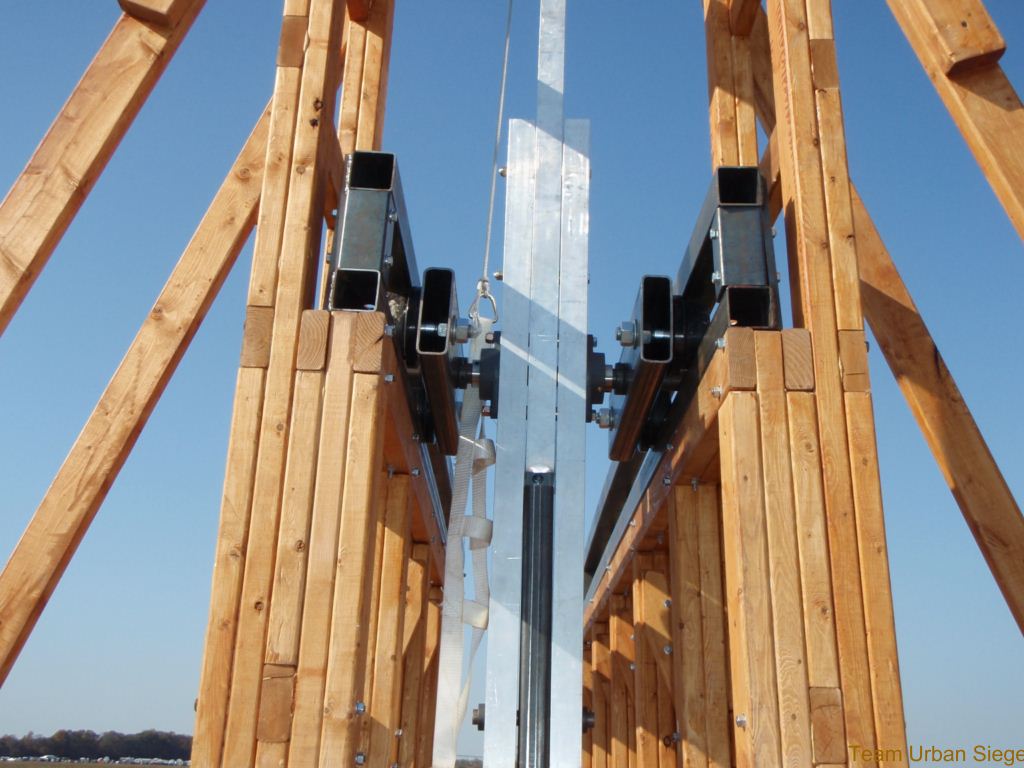

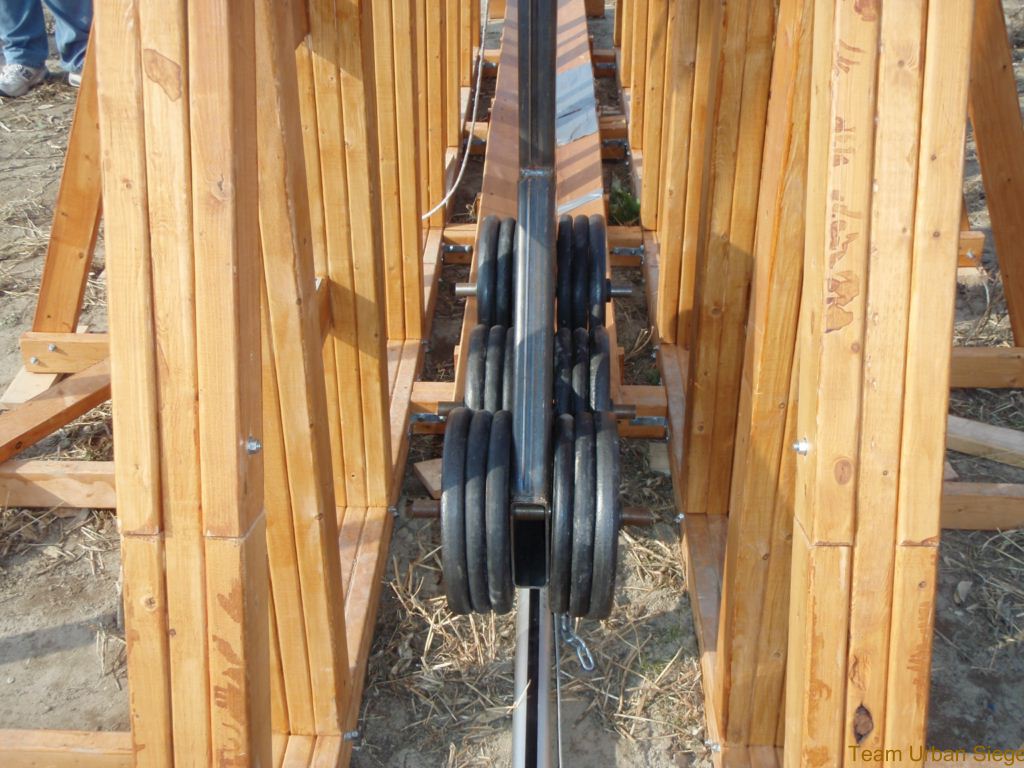
Our hanger was designed to hold 25 pound weight plates, as we had used on Melon Felon and Jeckyl and Hyde before. We already had 300 pounds of weight for there, and we bought 300 pounds more. But 24 plates on one bar would require a frame separation of over 36"! And that was before allowing clearance on each side of the axles to account for some slop. We didn't want to have to design an axle to handle being this wide, it would have to be probably 3 or more inches in diameter. Instead, we designed a hanger that had 3 weight axles, meaning that a 20" frame separation would give us 4" on each side of the axles for clearance. That was plenty, we felt. The hanger required extensive welding due to the fork at the bottom, but the end result was spectacular. Also, we only needed a 1.5 inch diameter main axle, though it was not a typical steel, but a special high-yield alloy.

10 foot long tracks proved to be too short (we really had only about 7.5 feet of travel due to the carriage length and the end stops), as evidenced by the fact that we hit our end stops on every single shot we took in Delaware, and even blew straight through them a couple of times at the end of the weekend. This culminated in our final competition shot on Sunday, where everything went wrong, with the arm and hanger swinging through as one instead of hinging, the pumpkin hit the actuator cradle, and the end result was the carriages blowing straight out the end stops, with the arm and hanger landing on the ground in front of the machine. Still, our maiden competition shot on Friday was a whopping success. Despite an early-morning misfire, we got off a 500.01 foot throw with only 300 pounds of counterweight! And it was only our second-ever shot with a 8+ pound pumpkin. The team was cheering hard after that one, and many friends (and people we didn't even know from other teams) were on hand cheering and congratulating us after that shot. We improved to 686.79 feet on Saturday with 400 pounds of counterweight, our best shot for 2008.
2009 Modifications
For 2009, we made several changes to Medieval Postal Service to get it firing as originally intended. The first thingwe did was to lengthen our tracks. The original 10 foot length had proven to be way to short, as release was occurring roughly at the same time as the carriages hit the end stops. After plenty of simulating in Working Model, it was determined that 14 foot length would be enough to allow proper movement and also allow a little room for some sort of shock absorption If we were going through the trouble of extending the frame and tracks 4 feet, 5 wouldn't be any harder, so we decided to add 5 feet to the tracks. This required extension of the supporting frame as well, and so new 3-piece base beams and 2-piece top beams were designed. We also added a second ladder near the front of the machine to allow us to work on the machine easier.
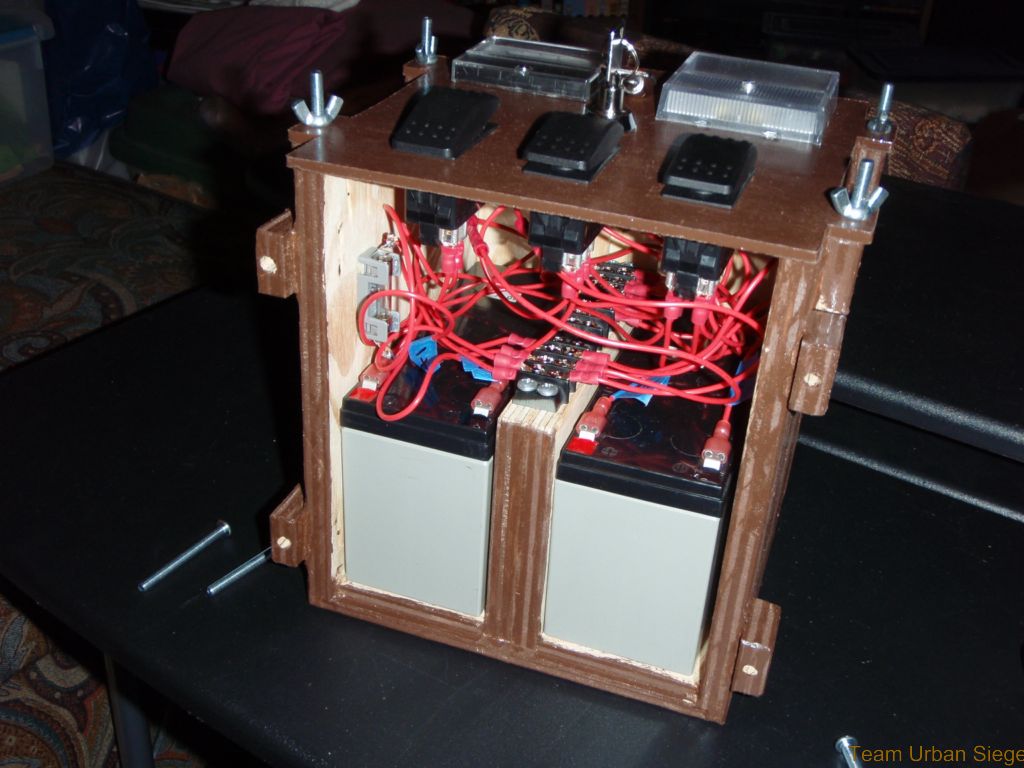
We also needed to do something with our actuation system. The air cylinder moved by a winch worked fine, despite being somewhat clumsy, but the big issue was that the pumpkin would hit the bracket holding the arm unless we yanked it out of the way. This required tricky timing that we rarely got right, and mistiming this was part of what resulted in our final shot's misfire at the 2008 World Championships of Punkin' Chunkin'. We had discussed several ways of hinging the bracket all through the World Championships, but the real solution came a few months later. The solution was a completely new actuation system, one utilizing an electric actuator with a hinged bracket on the front. By hooking up one or two simple 12 volt batteries, we could push the arm tip out and the hinged bracket would fall to the ground as soon as the counterweight began to pull the arm around. We also developed a control box to use with this system that would also allow us to use an electric horn to sound off before each shot. A horn is technically required at Delaware, though we got away without one in 2008. Not so in 2009, though the horn turned out to be a bit quieter than desired.
The other major thing that we did for 2009 was to straighten the tracks. During the welding process, the tracks developed a bow such that when the ends were spaced to be the same distance apart, the center was over 1" narrower. We were losing power having to push the carriages through this spot, and it also made alignment of the tracks a bit tricky. Using several thousand pounds of steel and an overhead crane, we bent the tracks back to be pretty straight, such that even with the new 5 foot extensions, we could align the entire length of the tracks to be no more than ±1/16" out of nominal. We also got all of the steel (tracks, carriages, hanger, brackets) powder-coated to protect the parts from rust.

While we were rebuilding the base beams, we also decided to redesign how the base was fastened together. In 2008 we used a series of angle brackets to hold all the cross braces and outrigger bases together. While they did hold together, the frames had a tendency to tip inward when the carriages were not on the tracks. Just in general, the base was not particularly well fastened together. We redesigned the base such that boards stretched the entire width of the frame, and everything was fastened together using more bolts and tee nuts. Ultimately we ended up with a pretty solid base, though it takes a bit longer to assemble than the old method.
All of this resulted in a much more stable machine that we were quickly able to get up to the full designed counterweight of 600 pounds. We also were able to get in several weekends of full-power testing, versus the one day of low-power testing that we managed in 2008. Our first test shot at the same counterweight (400 pounds), pumpkin weight (almost 9 pounds), and sling length as our 687 foot shot at the 2008 World Championships resulted in a massive pop-up shot that still traveled over 750 feet! We were feeling good, and we did break 1000 feet several times in testing. After packing up and going to Delaware, we unleashed a test shot Thursday evening that was in the 1200 foot range! However, we were not able to attain this distance during competition, shooting distances of 916 and 869 feet before adding 100 pounds of counterweight on Sunday and hitting 1064 feet. Still, this landed us in 9th place as the trebuchet division was incredibly strong in 2009. We still have not reached the potential of this machine yet, however.